Herbed Breakfast Potatoes

Comment

Herbed Breakfast Potatoes

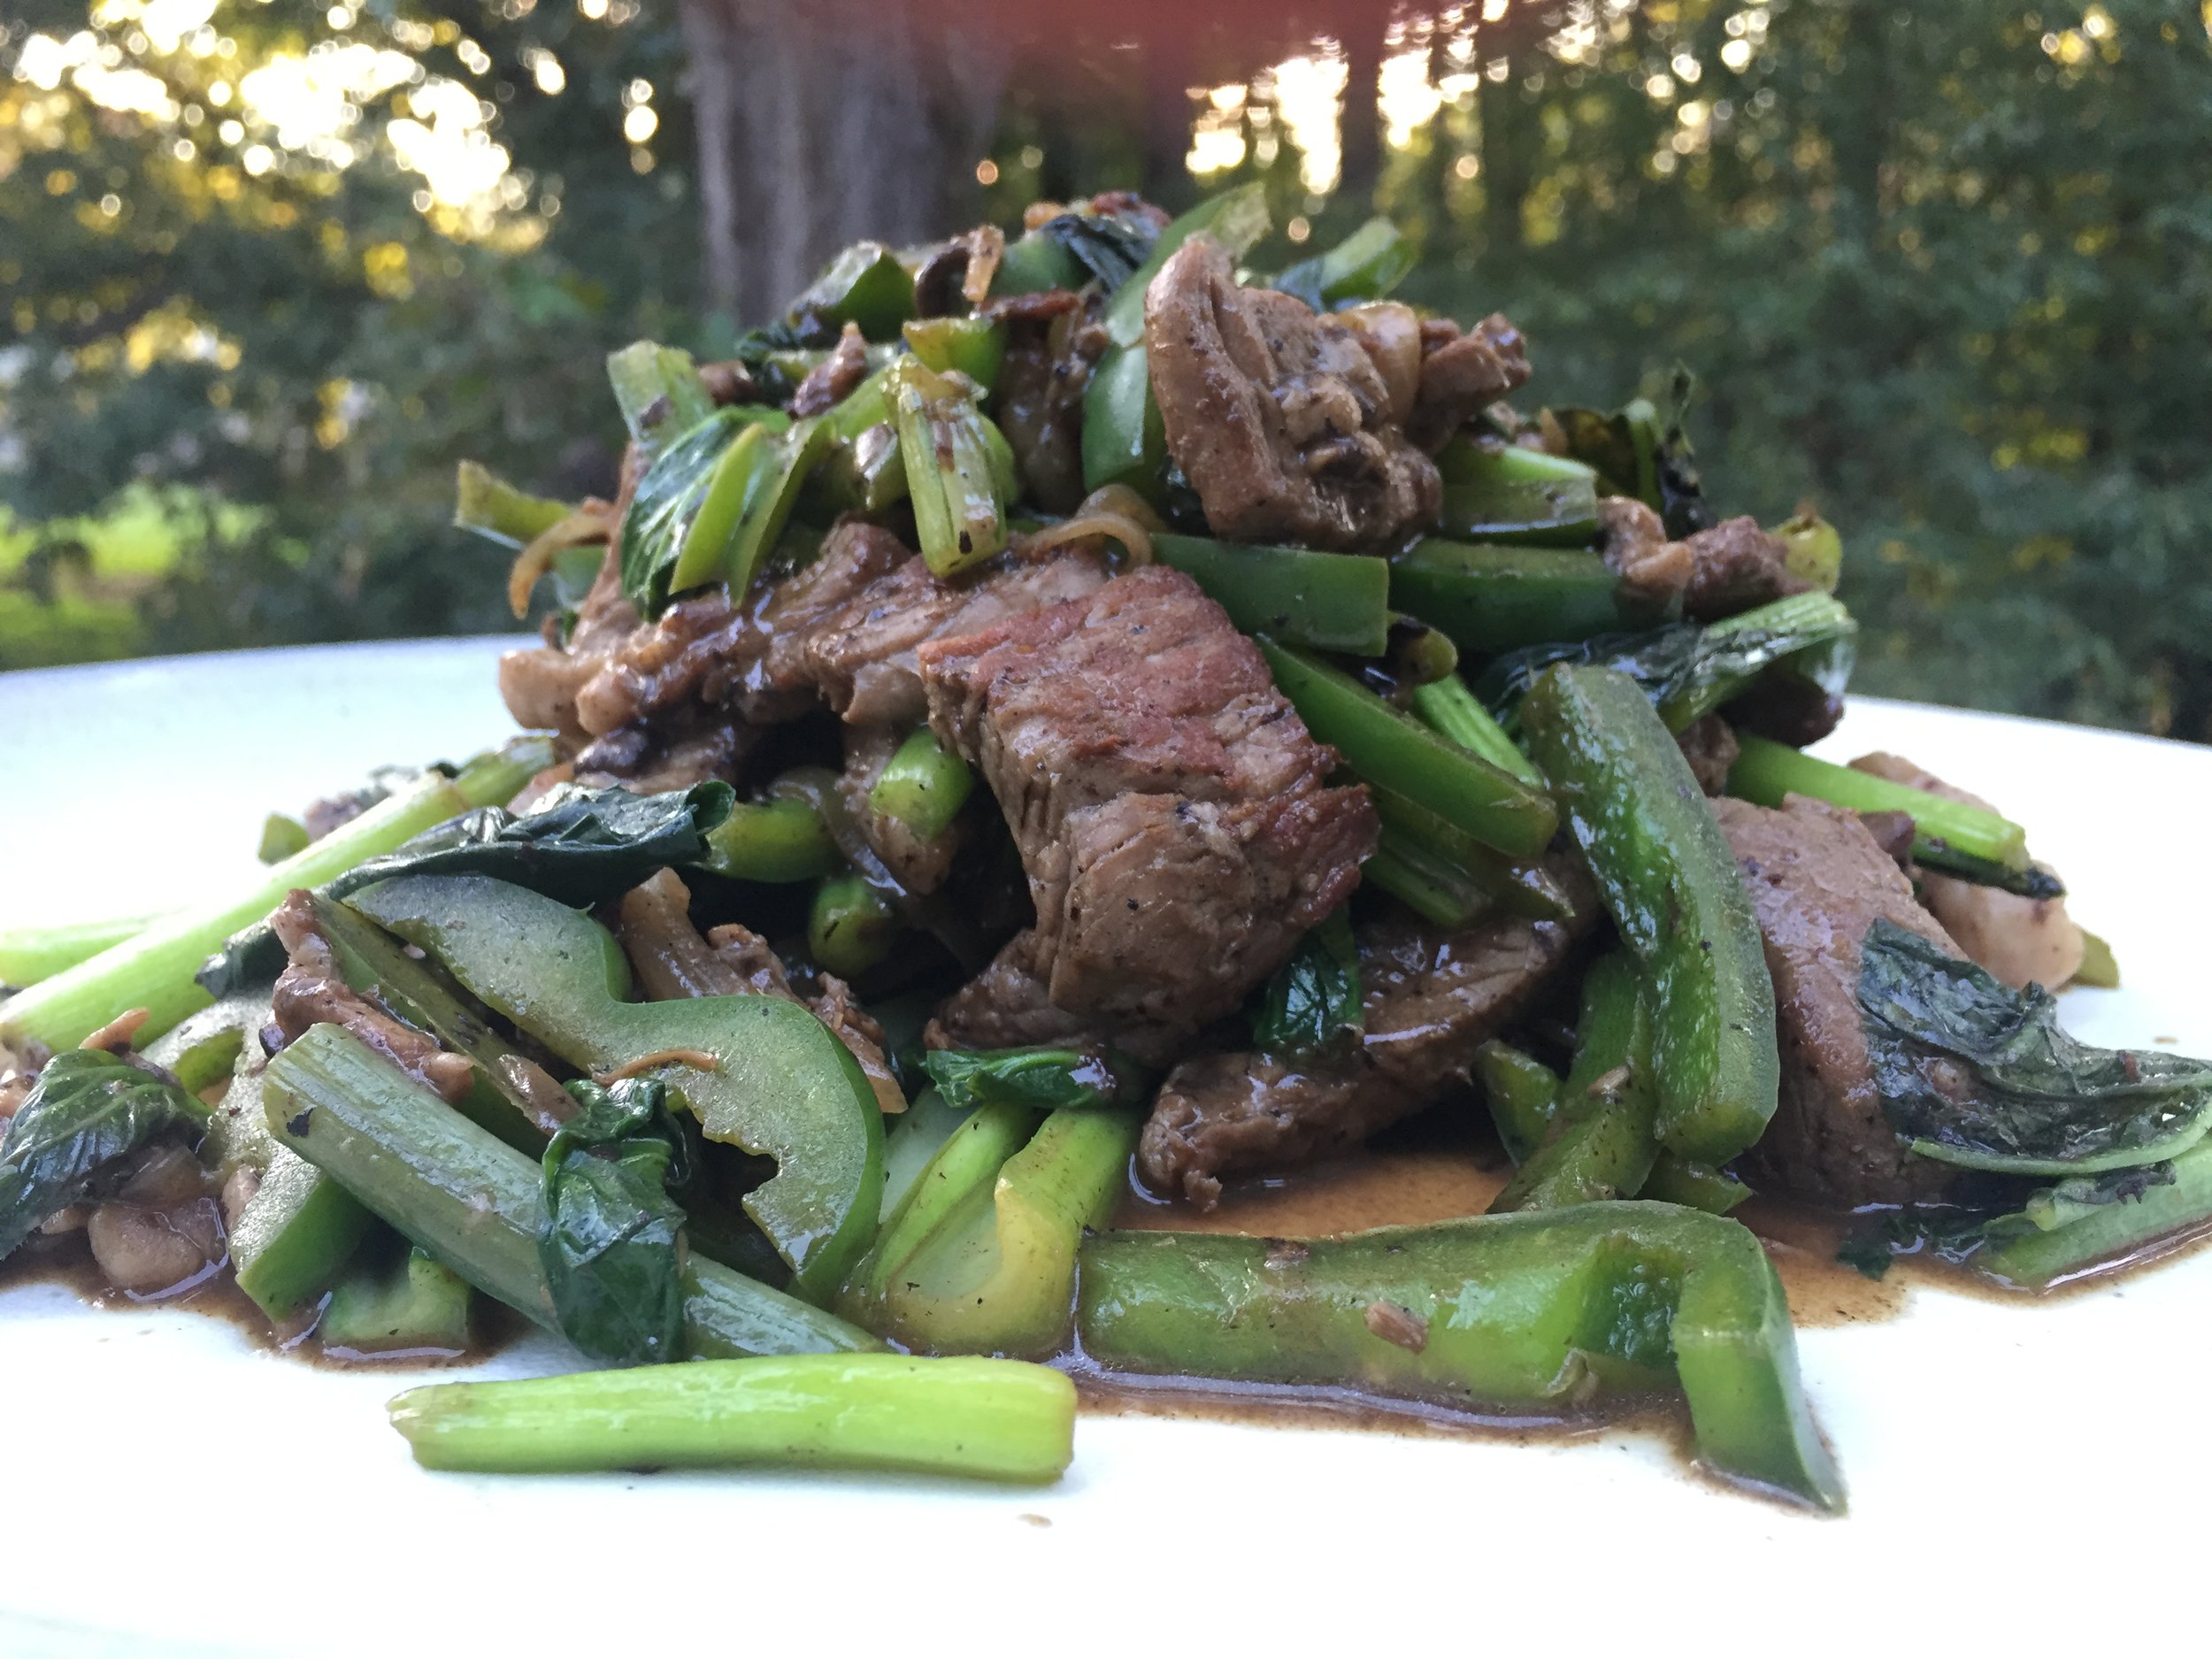
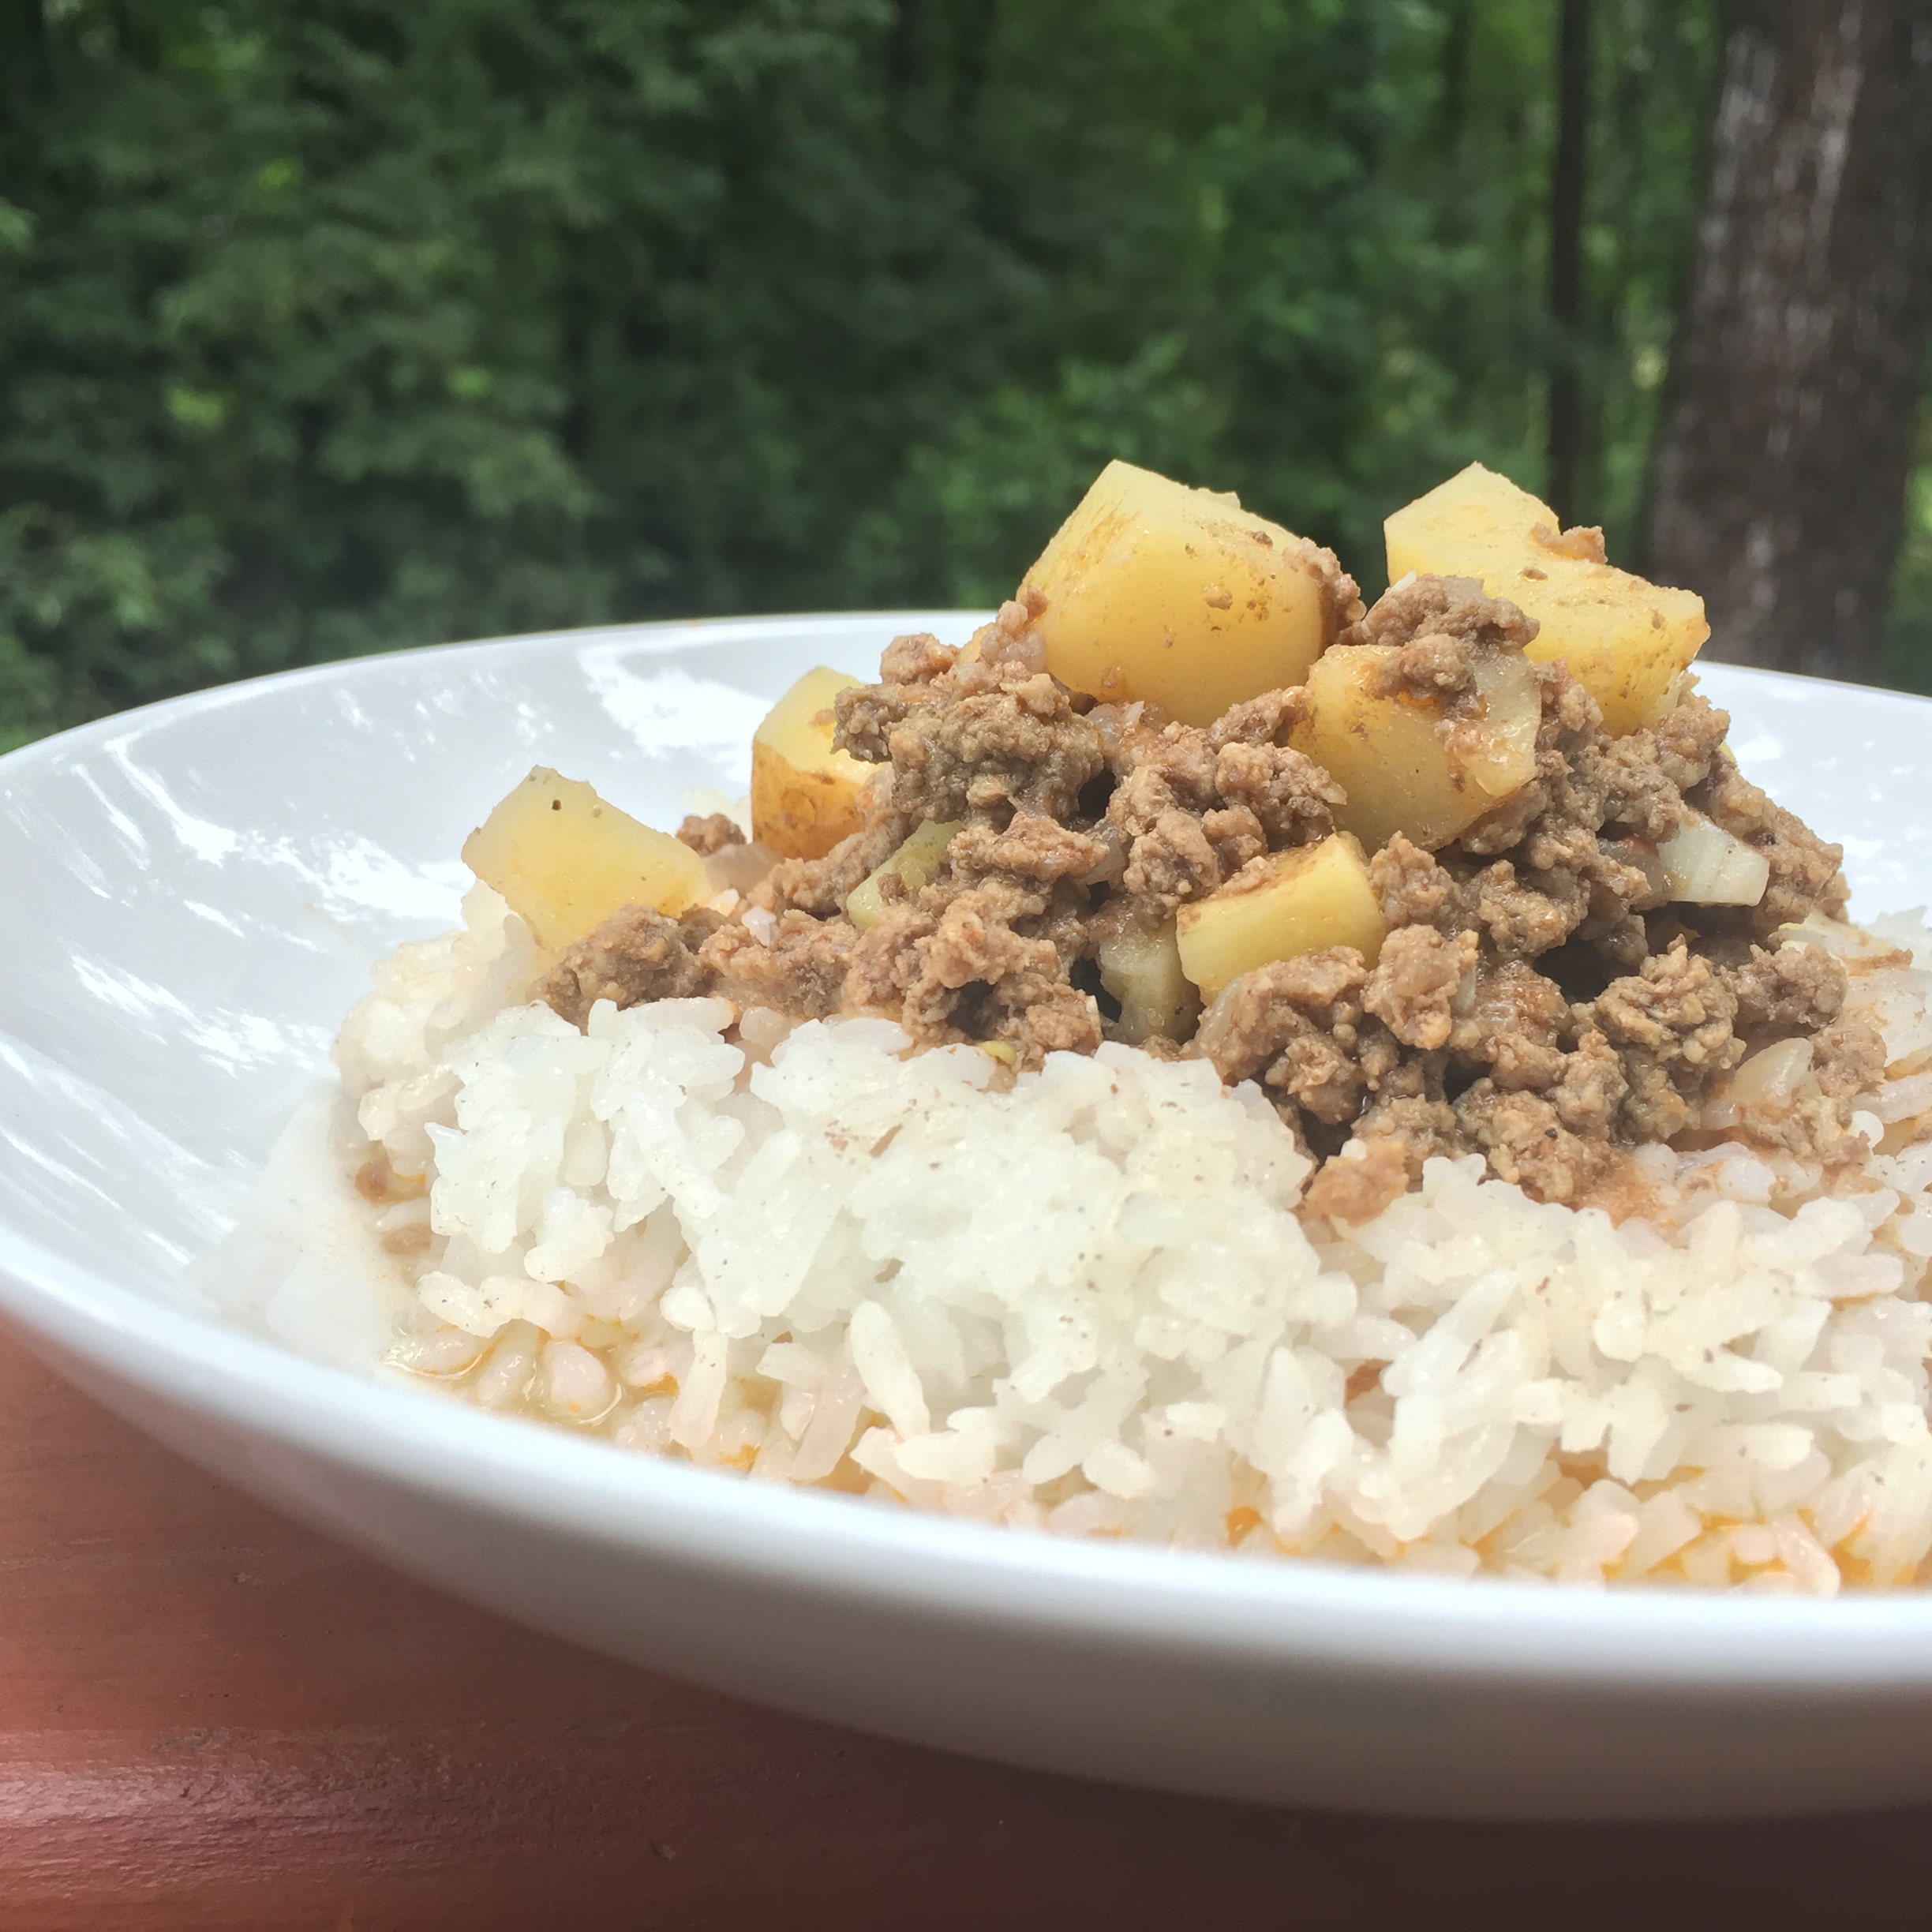
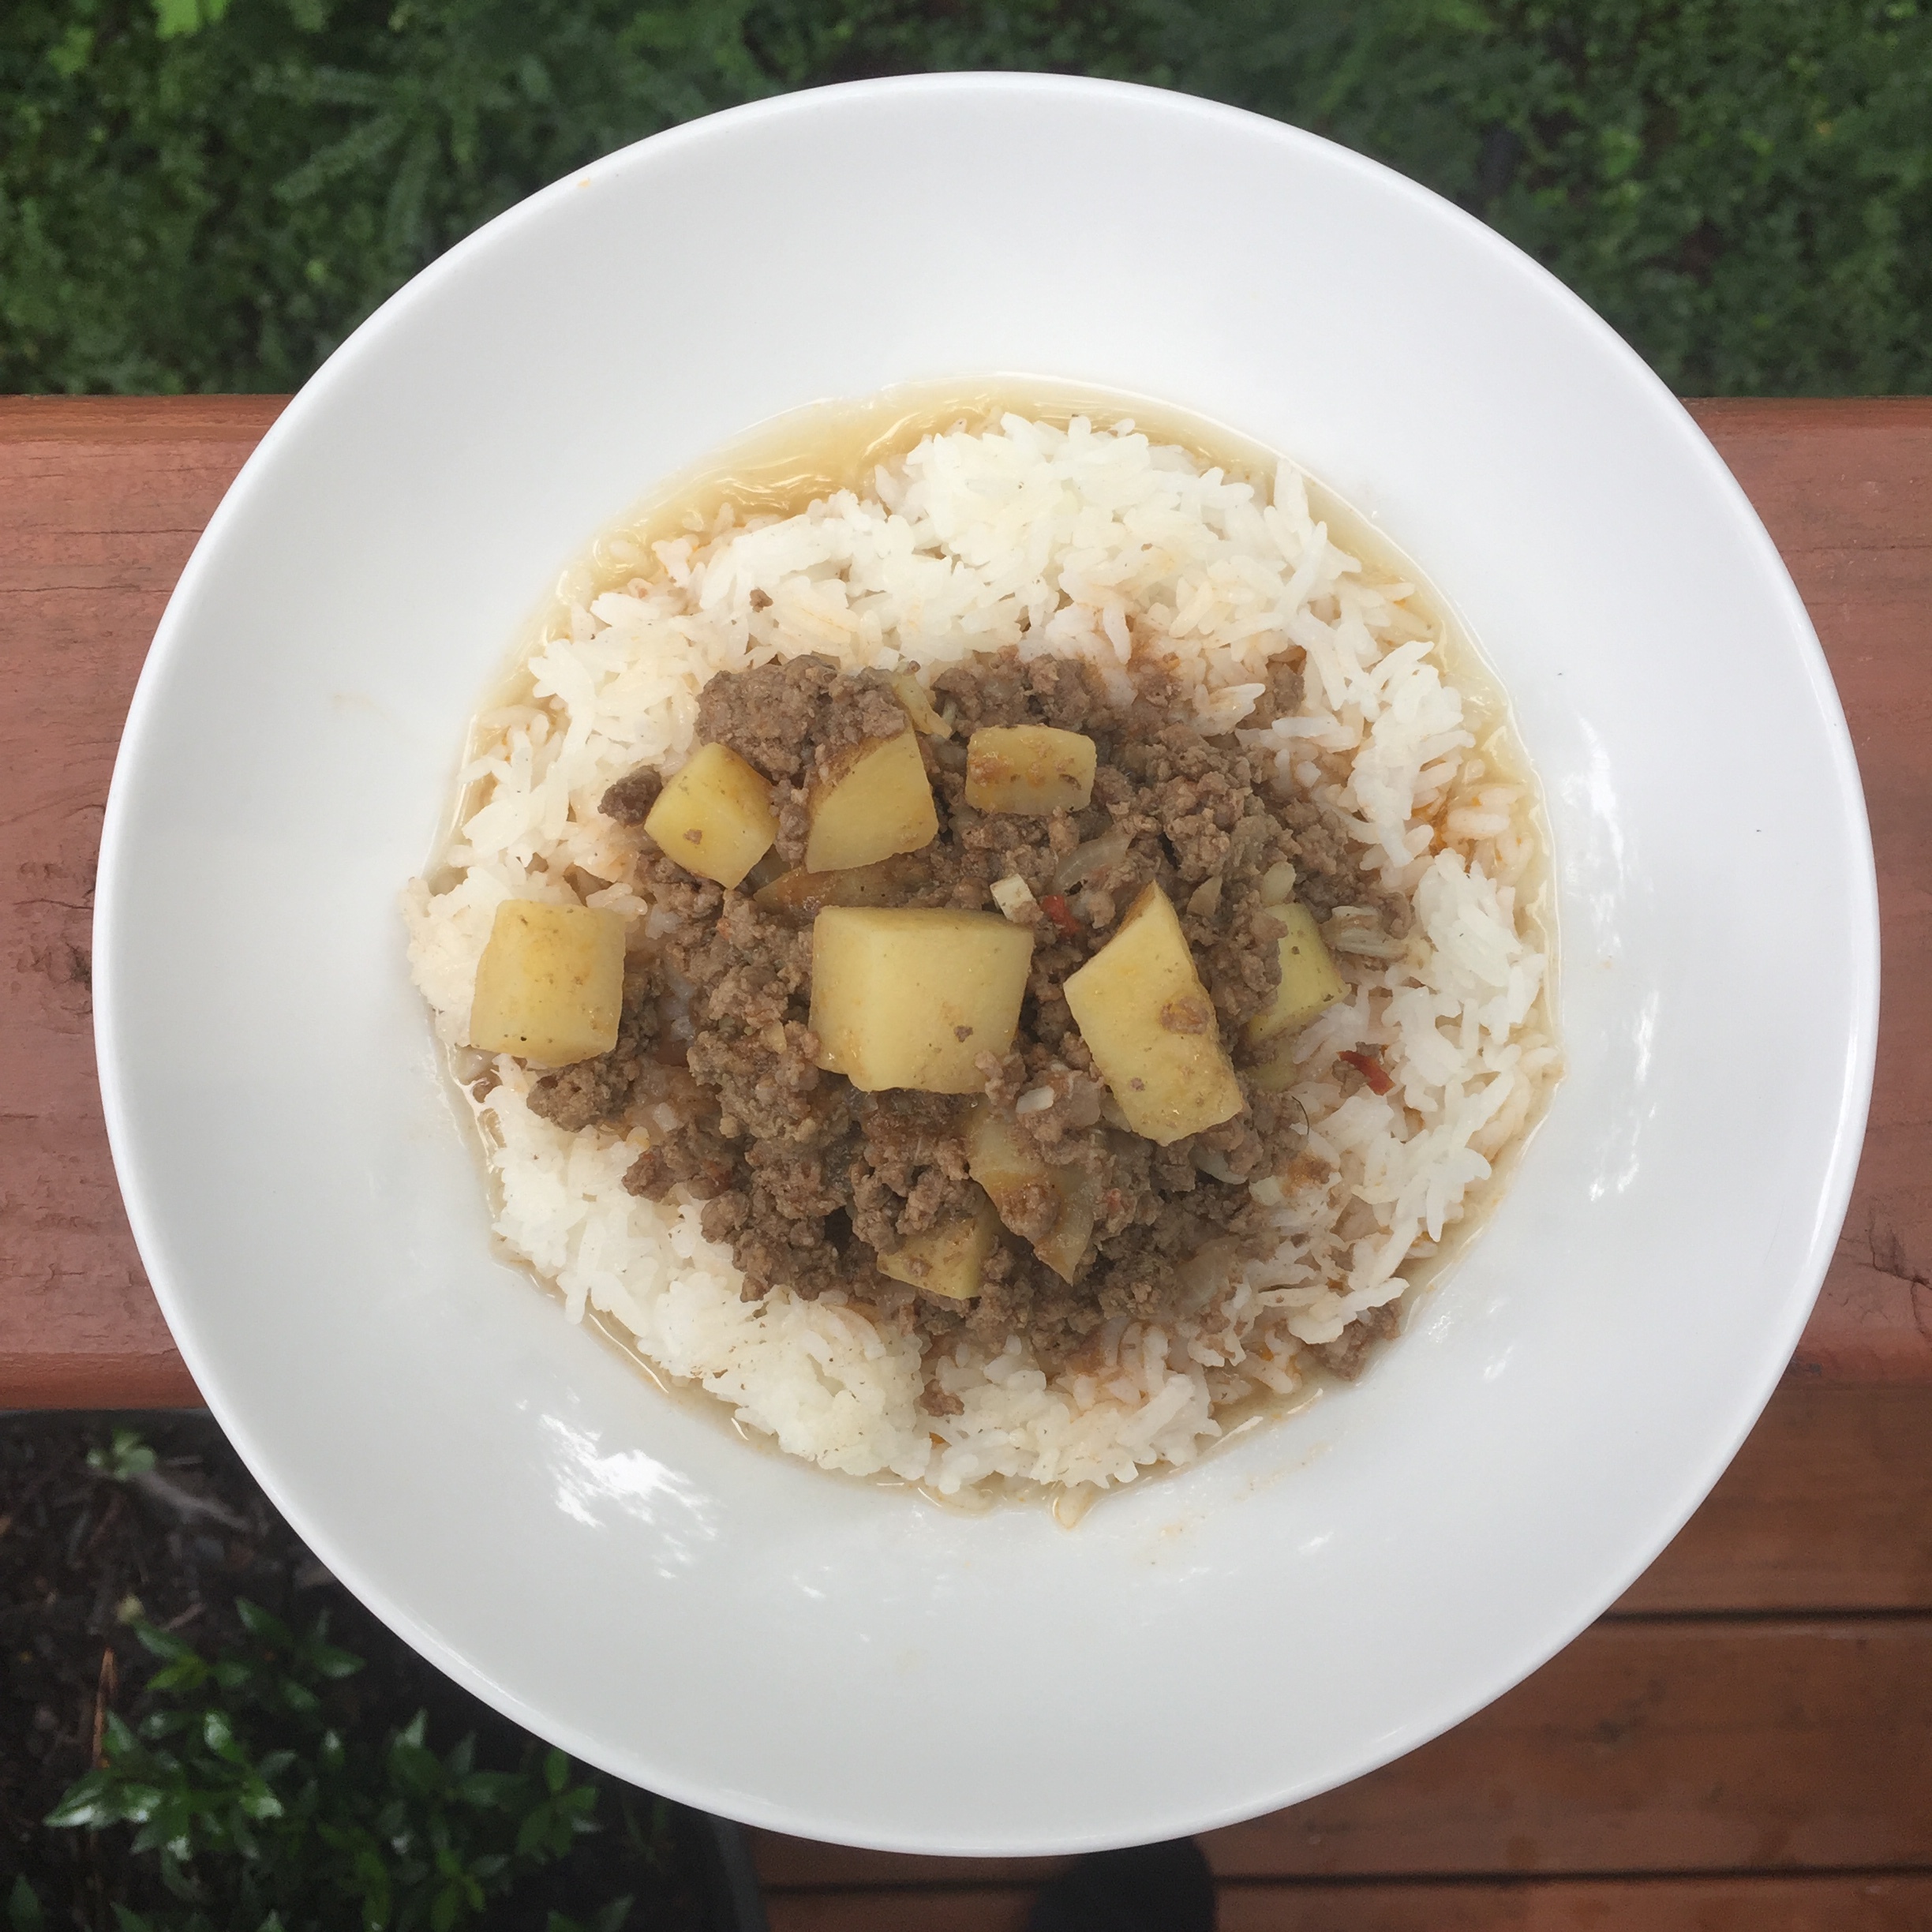
Simple ingredients, outstanding taste. This is the perfect compliment to any breakfast or to have as a starch side. For breakfast, I like to eat this alongside a piece of sourdough bread, a fried egg and some fruit. For dinner, it goes great with a side of protein like pan seared chicken thighs or a steak and greens. The chicken/vegetable broth adds moisture and prevents any burnt potatoes while achieving an even cook.

Photo: Manna Hara

Photo: Manna Hara

Ingredients

Serves 4-5

  • 3 medium sized potatoes (can be any variety), cut in small cube bite-sized pieces (with or without skins, your preference)

  • 1/2 a large yellow onion, diced

  • 4-5 garlic cloves, minced

  • olive oil/butter

  • 1/2 cup of chicken or vegetable broth

  • 1 Tbsp lemon juice

  • Fresh herbs, diced: parsley, thyme, oregano

  • salt and pepper


  1. Cut potatoes in small, cube sized pieces. The more uniform the pieces, the more even the cook. Larger cubes will take longer to cook. Soak and rinse cut potatoes at least twice to wash off excess starch.

  2. Drizzle olive oil/butter on sauté pan on medium-high. Start to sauté the diced onions and add a sprinkle of salt. The salt will draw out the moisture from the onions and help cook them down faster.

  3. Add potatoes to pan. Stir occasionally.

  4. After about 5 min., add minced garlic, salt, and pepper. Garlic is added later to prevent burning. Continue cooking for about 2 min.

  5. Add your broth and lemon juice to the pan. The bottom should be covered in liquid. Reduce heat to medium-low.

  6. As the liquid starts to reduce, add your fresh herbs. If you don’t have any fresh, dried herbs are fine. I like to add more parsley and thyme than oregano.

  7. Once all the liquid is gone, fork test your potatoes. The fork should be able to poke through cleanly. If potatoes aren’t fully cooked, add more broth to continue cooking.

  8. Serve and enjoy!

Recipe from Manna Hara

Print Friendly and PDF

Comment

Guinean-style Sweet Potato Greens Stew

Comment

Guinean-style Sweet Potato Greens Stew

If you’re struggling to find local kale, spinach, or cabbage during the heat of the summer, sweet potato greens are an EXCELLENT substitute. They have a mild flavor similar to swiss chard or spinach. Cultures around the world from China to Ethiopia eat these greens as well. It’s been widely eaten during periods of scarcity because the greens can be continuously harvested as growers await the roots (sweet potatoes) to grow until harvest. When cooked properly, they are tender and practically melt in your mouth.

Photo: Oumou | Kadi Recipes

Photo: Oumou | Kadi Recipes

Ingredients

Serves 2-3

  • 300g (a little less than 3/4 lbs) sweet potato leaves, finely chopped and washed

  • 250g beef, cut into small pieces

  • 1 small whole white fish

  • 6 okras cut finely

  • Hot pepper (to taste)

  • 100ml of palm oil

  • 1 large white onion, sliced

  • 1 or 2 bouillon cubes

  • Salt (to taste)

  • 1 scallion, finely chopped (optional)

  • Smoked fish (optional)

  • 3 cups of water


Note: If your potato greens are not fresh, soak them in water for 2 hours before the cooking time.

Step 1: In the cooking pot, put the meat and fish. Then add 1 of water and salt. Bring it boil for 10 minutes.

Step 2: Remove the fish from pot and set aside, let it cool down for few minutes, then remove de bones.

Step3:  Add the potato greens with the remaining water and simmer for 10 minutes.

Step 4:  Add the onion, spring onion, bouillon cubes and palm oil.

Step 5: Add hot pepper and salt. Then return the fish in the pot and the sliced okra. Simmer on medium heat for 20 minutes. Stir the sauce regularly. The sauce is ready when all the liquid is totally absorbed.

Step 6: Serve with rice and enjoy!

Recipe from Oumou | Kadi Recipes

Print Friendly and PDF

Comment

Korean Marinated Cucumber Banchan (Oi Muchim)

Comment

Korean Marinated Cucumber Banchan (Oi Muchim)

Need a new way to prepare all those cucumbers that are in season? Try these palate-cleansing tart, spicy, and just a tad sweet marinated Korean cucumbers! “Oi muchim is a Korean banchan that shows off the best attributes of cukes…These marinated cucumbers hold on to the crunch and succulence of fresh raw vegetables, but pick up heat from the gochugaru along with salinity and acidity from the dressing, giving classic pickled cukes a serious run for their money.” - Sunny Lee

Photo: Vicky Wasik | Serious Eats

Photo: Vicky Wasik | Serious Eats

Ingredients

Serves 2 to 3 as a large side dish, or 4 to 6 as a banchan

  • 4 Persian cucumbers (about 10 1/2 ounces), sliced crosswise 1/2 inch thick (or regular cucumbers seeds removed)

  • 1 Tbsp coarse ground gochugaru (Korean chili flakes)

  • 1 1/2 tsp kosher salt

  • 1 tsp sugar

  • 2 Tbsp unseasoned rice wine vinegar

  • 1 tsp fish sauce

  • 1 medium garlic clove, very finely minced or grated

  • 3 Tbsp toasted sesame oil

  • 1 Tbsp toasted sesame seeds


  1. In a medium bowl, combine cucumbers, gochugaru, salt, and sugar. Using clean hands (gloves optional), massage cucumbers, squeezing and tossing them with seasoning, until cucumber is well-coated on all sides and begins to release liquid and color of gochugaru brightens to vibrant orange-red, about 1 minute.

  2. Transfer cucumbers to a colander, then set colander inside bowl used to season cucumbers. Cut a round of parchment paper large enough to cover surface of cucumbers, and place over cucumbers. Then place a weight on top of parchment to press down on cucumbers (canned goods, a cast iron skillet, etc). Set aside to drain for at least 30 minutes and up to 1 hour.

  3. Meanwhile, in a separate medium bowl, whisk together rice wine vinegar, fish sauce, and garlic. Whisking constantly, slowly drizzle in sesame oil until emulsified.

  4. Once cucumbers have drained, remove weight and discard parchment paper. Using clean hands, squeeze cucumbers to get rid of excess moisture, then transfer to bowl with dressing; discard accumulated cucumber liquid. Toss cucumbers with dressing until well-coated all over, about 30 seconds. Add sesame seeds and toss to combine. Divide between small individual serving bowls and serve, or transfer to airtight container and refrigerate for up to 2 days.

Recipe from Sunny Lee | Serious Eats

Print Friendly and PDF

Comment

Potato and Leek Soup

Comment

Potato and Leek Soup

A classic European feel good soup. Think of it as eating a side of potatoes with any dish, but in soup form. Potato and leek soup is traditionally Welsh, but also known by the Romanians as Ciorbă de praz or the French as Soupe aux poireaux. This easy soup can be frozen for future meals and a great compliment to all of you who are making pandemic home-baked breads!

Photo: Jennifer Segal | Once Upon a Chef

Photo: Jennifer Segal | Once Upon a Chef

Ingredients

Serves 6

  • 3 TBS unsalted butter

  • 4 large leeks, white and light green parts only, roughly chopped (about 5 cups)

  • 3 cloves garlic, peeled and smashed

  • 2 pounds Yukon or Russet potatoes, peeled and roughly chopped into 1/2-inch pieces

  • 7 cups low sodium chicken or vegetable broth

  • 2 bay leaves

  • 3 sprigs fresh thyme

  • 1 tsp salt

  • 1/4 tsp ground black pepper

  • 1 cup heavy cream

  • Chives, finely chopped, for serving as garnish

  • Optional: shredded cheddar cheese/hot sauce


  1. Thoroughly clean your leeks!

  2. Melt the butter over medium heat in a large soup pot. Add the leeks and garlic and cook, stirring regularly, until soft and wilted, about 10 minutes. Adjust the heat as necessary so as not to brown.

  3. Add the potatoes, broth, bay leaves, thyme, salt and pepper to pot and bring to a boil. Cover and turn the heat down to low. Simmer for 15 minutes, or until the potatoes are very soft.

  4. Fish out the thyme sprig and bay leaves, then purée the soup with a hand-held immersion blender until smooth. (Alternatively, use a standard blender to purée the soup in batches; see note.) Add the heavy cream and bring to a simmer. Taste and adjust seasoning with salt and pepper. If soup is too thin, simmer until thickened. If it's too thick, add water or stock to thin it out. Garnish with fresh herbs if desired.

    Note: If using a standard blender to purée the soup: be sure not to fill the jar more than halfway; leave the hole in the lid open and cover loosely with a dishtowel to allow the heat to escape; and pour blended soup into a clean pot.

Recipe from Jennifer Segal, Once Upon a Chef

Print Friendly and PDF

Comment

Spicy Stir-Fried Chinese Long Beans

Comment

Spicy Stir-Fried Chinese Long Beans

Chinese long beans are exactly that…long, beans. Also known as yard-long beans, noodle beans, or chopstick beans, they are a staple vegetable in most of Southeastern Asia. They come in multiple varieties, most commonly green and red (red beans will turn green when cooked). They are crunchier in texture and thinner than regular green beans, but they taste the same! You can eat them raw or use them the same way you’d use in any green bean recipe.

Photo: Seonkyoung Longest

Photo: Seonkyoung Longest

Ingredients

Serves 6

FOR THE SAUCE

FOR STIR FRY

  • 1 Tbsp cooking oil (only if you are using center cut bacon)

  • 6 slices of thick center cut or 4 slices of thick cut bacon, cut into bite sizes

  • 3 cloves garlic, chopped

  • 1 small shallot, chopped (or substitute to 1/4 of small onion)

  • 1 lb long beans, cut into 2-inches long (or substitute green beans)

  • 1/4 cup chicken stock


  1. In a small mixing bowl, combine all the ingredients for the sauce. Set aside.

  2. Heat a wok or a large sauce pan over high heat, add oil and bacon. Cook the bacon until the edges are crispy and enough oil is released.

  3. Add chopped garlic and shallot. Stir fry for 30 seconds to 1 minute or until you can smell the fragrance.

  4. Before the garlic and shallots get burn, pour the sauce mixture. Stir fry all together for 30 seconds to 1 minute. Be careful not to burn the sauce.

  5. Add long beans and chicken stock. Now, cover with a lid and let them steam for 5 to 6 minutes. Stir occasionally. If don’t have a lid, add additional 1/4 cup water. Stir fry for 5 to 6 minutes or until all the moisture’s evaporated.

  6. Serve on a serving plate and enjoy!

Recipe from Seonkyoung Longest

Print Friendly and PDF

Comment

Crispy Ginger Rice with Leeks, Shiitakes, & a Fried Egg

Comment

Crispy Ginger Rice with Leeks, Shiitakes, & a Fried Egg

Any type of fried rice is an efficient and fast way to cook those extra veggies with rice that I’m sure you have on hand. You can use leftover rice or cook a new pot the night before. Leeks in particular are a great alternative to using onions or shallots, except they’re a little bit sweeter. You can add hot peppers for an extra spice or an extra egg even. Makes a great breakfast dish with a side of sausage. Enjoy this very comforting and fresh take on fried rice!

Photo: Rex Miller

Photo: Rex Miller

Ingredients

Serves 2

  • 1/2 cup long-grain rice

  • 3 TBS butter, divided

  • 1 TBS vegetable oil

  • 1 cup diced fresh shiitake mushrooms (you can substitute any mushroom you like)

  • 1 heaping TBS minced ginger

  • 1 cup thinly sliced leeks, white parts only

  • 1/4 tsp red pepper flakes

  • 1 tsp salt, divided

  • 2 large eggs

  • 2 tsp coarsely chopped fresh cilantro


  1. Cook the rice according to the instructions, and let it sit uncovered in the refrigerator a minimum of an hour and up to overnight. This allows the rice to dehydrate slightly and will make it crispier in the end.

  2. In a 10- to 12-inch sauté pan, heat 1 tablespoon of the butter and the vegetable oil over medium heat until foaming. Add the shiitakes. Shake the pan once and let the mushrooms sit and caramelize for 2 minutes. Drop in the ginger. Then add 1 tablespoon butter followed by the cooked rice. Press it into a thin layer over the surface area of the entire pan. Once you’ve pressed the rice out, leave it there, resisting the urge to shake or stir. To the top of the rice, add the garlic, leeks, chili flakes, and 1/2 teaspoon salt. After about 3 minutes, turn up a little rice on the edge of the pan with a spatula. Assuming it’s started to take on a slight golden color and crispy texture, stir in the ingredients that were sitting on top and press the rice down again into a homogenous layer. Let it go another 2 minutes before removing it from the heat.

  3. Cook the eggs and serve: In a 10-inch cast- iron skillet or whatever pan you prefer for cooking eggs, heat the remaining 1 tablespoon butter over medium heat until foaming. Crack the eggs on opposite sides of the pan. Cook gently about 2 minutes, until the whites are set. Sprinkle the eggs with the remaining 1/2 teaspoon salt.

  4. Fluff the rice and serve under a runny egg. Garnish with cilantro.

Recipe from Vivian Howard, Deep Run Roots

Print Friendly and PDF

Comment

Garlic-Herb & Parmesan Roasted Red Potatoes

Comment

Garlic-Herb & Parmesan Roasted Red Potatoes

High in moisture and low in starch, red potatoes are GREAT for roasting and skillet cooking. The skins are so thin, you can leave them on and they won’t impede in the flavor or texture of the potato. PLUS, they’re full of fiber, B vitamins, iron, and potassium. If you have your own herb garden, potatoes are the best compliment. Here’s a classic roasted red potato recipe that’s a sure hit for you, your partner, and/or your entire family!

Photo: Michelle | BrownEyedBaker

Photo: Michelle | BrownEyedBaker

Ingredients

Serves 8-10

  • 3 lbs petite red potatoes (scrubbed and halved, quartered if extra large)

  • 4 TBS olive oil

  • 6 cloves garlic (minced)

  • 1½ tsp kosher salt

  • 1 tsp ground black pepper

  • 1 tsp dried thyme

  • ½ tsp dried oregano

  • ½ tsp dried basil

  • ⅓ cup grated Parmesan cheese

  • 2 TBS unsalted butter (cut into small cubes)

  • 2 TBS minced fresh parsley


  1. Preheat oven to 400 degrees F. Lightly grease a large baking sheet.

  2. In a large bowl, toss the potatoes, olive oil, garlic, salt, pepper, thyme, oregano, basil and Parmesan cheese until evenly coated. Turn the mixture out onto the prepared baking sheet and arrange in a single layer.

  3. Bake for 45 minutes to 1 hour, turning with a spatula two or three times, until golden brown and crisp. Pull the tray out and sprinkle the butter over the potatoes and stir to melt the butter. Remove from the oven and toss with the fresh parsley. Serve immediately.

Recipe from Michelle, BrownEyedBaker

Print Friendly and PDF

Comment

Purple Long Bean Salad with Roselle, Mustard, and Sesame

Comment

Purple Long Bean Salad with Roselle, Mustard, and Sesame

Most purple vegetables lose their color when you cook them but these purple long beans stay a vivid purple. They are deeply savory and provide an earthy counterpoint to the sour roselle leaves in this salad.


Ingredients

  • 1/2 pound purple long beans, cut into 1" sections
  • 2 mild chile peppers, cut into skinny rings
  • 5 leaves of roselle, rolled like a cigar and sliced into thin shreds
  • 1 tbs whole grain mustard
  • 1/4 tsp hot sesame oil
  • 1 tbs vegetable oil
  • 2 tbs rice vinegar
  • 1 tsp toasted sesame seeds
  • 1 tbs salt

  1. Bring a large pot of water to a rolling boil. Add 1 tbs of kosher salt and give it a minute to dissolve.
  2. Put the beans in the boiling water and stir them around. Let them cook for 2-3 minutes until they are just soft all the way through, but do not overcook to mush.
  3. Scoop out all of the beans into a mixing bowl.
  4. While still hot toss with all of the remaining ingredients. 
  5. Allow to cool before serving, the salad can be served either fully cold or at room temperature.

Enjoy
-Matt

Print Friendly and PDF

Comment

Summer Squash Soup

Comment

Summer Squash Soup

Yellow summer squash is one of those vegetables that I think is unappreciated because of its outstanding abundance and versatility. It's great in stir fry, eggs, and casseroles but is often relegated to being a supporting player instead of the star of the show. This soup stars yellow squash and uses sweet corn to complement the sweetness of the squash and a touch of cumin and curry for warmth.


Ingredients

Serves 6-8

  • 4 yellow summer squash, chopped up
  • kernels from 2 ears of corn
  • 1 medium yellow onion, sliced
  • 2 cloves garlic, minced
  • 1 tbs vegetable oil
  • 1 tbs crystallized ginger, minced
  • 1/2 tsp curry powder
  • 1/4 tsp cumin
  • 1/2 tsp ground black pepper
  • 1 tbs kosher salt
  • 2-3 cups of water
  • 1/2 cup sour cream
  • 1-2 jalapeno peppers, minced

  1. Heat a large pot or dutch oven over medium high heat.
  2. Peel and slice the onion. Add it to the pot so it can start to caramelize while you prepare the other vegetables. Stir only occasionally to allow the onions to brown nicely. Give it a sprinkle of salt.
  3. Slice the garlic, cut the kernels off the corn, and chop up the squash. This soup will be pureed so you don't have to worry too much about cutting things into beautiful equal pieces. Smaller pieces will give you more surface area for browning which leads to deeper flavors and more of that umami richness. But don't over think it.
  4. When the onion has browned nicely, stir in the garlic and let that cook for a minute on its own. Add the ginger, cumin, black pepper, and curry powder. Stir and let the spices cook with the aromatics for about a minute before moving to the next step.
  5. Turn the heat up to high and add the squash and corn. Both of these vegetables will give off a substantial amount of liquid and you want to cook that down as quickly as possible to promote browning. 
  6. Cook for about 20-30 minutes, stirring as needed to caramelize the vegetables evenly, but don't worry if they don't pick up a lot of color in this process. You may need to turn the heat down depending on your stove. Don't be tempted to rush here. If you have the time to go lower and slower with stewing these vegetables it will yield deeper and richer flavors for your soup.
  7. Add 2 cups of water and stir to combine. Bring to a boil and then simmer for 5-10 minutes. This will help blend all of the flavors together. If you weren't going to puree the soup you would need to cook in this phase for longer, but the blender does a lot of the work of blending the flavors.
  8. Puree the soup in a blender. You may need to add more water here to achieve the desired consistency.
  9. If you are like my father-in-law and you like your soup really really hot you can put it back in the pot and heat it up again at this point. If you have somehow added too much water you can gently cook the soup down to thicken it again, too.
  10. Taste your soup. You can add more salt here or more spices if you like. I purposely didn't put a lot of spices because I wanted the squashiness to be the dominant flavor, but if you prefer a more heavily spiced soup I can understand that.
  11. Ladle in to bowls and garnish with a dash of cumin, a dollop of sour cream and minced jalapeno (according to your tolerance for hot peppers).

Enjoy
-Matt

Print Friendly and PDF

Comment

Tomato! and Cucumber Salad with Basil

Comment

Tomato! and Cucumber Salad with Basil

I get really excited about tomatoes, and I'll eat them every way I can when they are in season. I often think that the best ways are the simplest. Radical farmer Joel Salatin famously said "I love the pigness of the pig." This salad lets the tomato-ness of the tomato shine through and be celebrated.


Ingredients

  • 6 small-ish ripe tomatoes
  • 1 cucumber
  • 10 small leaves fresh basil (If your basil has gone to flower that's great! Use the flowers, they are delicious and so pretty on a salad.)
  • 1 tbs mirin
  • 1 tbs rice wine vinegar
  • a pinch of coarse sea salt

  1.  Grate the cucumber on the large holes of a box grater.
  2. Add the mirin and rice wine vinegar to the cucumber.
  3. Cut the tomatoes into eighths.
  4. Gently toss the tomatoes and basil with the cucumber dressing to fully coat.
  5. Arrange on a plate and sprinkle generously with coarse salt.

Enjoy
-Matt

Print Friendly and PDF

Comment

Summer Vegetable Stir Fry

Comment

Summer Vegetable Stir Fry

My 8-year-old picked out the vegetables for this dish from our share. He was supposed to help me cook them, but got distracted by something else when it came time to cook. Maybe your kids will help you with this one, it's a great summer vegetable dish, especially when you're in a hurry. We are really enjoying the sauces from Chinese Southern Belle, the Teritaki Glaze makes this recipe fast and delicious.


Ingredients


  1. Prepare all of the vegetables and keep them close at hand.
  2. Heat a cast iron pan or wok over high heat to get it nice and hot.
  3. Add the oil, wait a beat and then toss in the onion.
  4. Stir it around, let it cook quickly but not brown.
  5. Add the beans and continue to stir. Add in the water, this will help steam the beans.
  6. After a couple minutes when the beans start to soften and the water has boiled away add the celery, squash, and teriyaki glaze.
  7. Stir to coat and finish cooking. When the squash is soft everything is done.
  8. Serve with steamed jasmine rice.

Enjoy
-Matt

Print Friendly and PDF

Comment

Rigatoni with Summer Sweet Corn, Cherry Tomato, and Birdseye Chili Peppers

Comment

Rigatoni with Summer Sweet Corn, Cherry Tomato, and Birdseye Chili Peppers

This dish is a song about summer. It's also a really fun and different way to cook pasta. As much as I love corn and tomatoes, the birdseye chilis are my favorite thing about this dish. They pack a ton of flavor and heat so use them sparingly according to your tolerance but do not leave them out, they are the star of the show.

Photo Aug 30, 5 44 22 PM.jpg

Ingredients

serves 4-6

  • 4 ears of corn

  • 1 medium yellow onion, minced

  • 4 cloves garlic, minced

  • 1 tbs vegetable oil

  • 1 pint of cherry tomatoes, halved

  • 2 tsp kosher salt

  • 2-4 birdseye chilies

  • 1 # box of rigatoni

  • 1 oz fresh chevre


  1. Shuck the corn, cut off the kernels and reserve them. Put the cobs in a small stock pot and add 2 quarts cold water.

  2. Bring this to a boil and simmer for 30 minutes. This is your corn stock that you will use to cook the pasta.

  3. While the corn stock is simmering, chop up the onion and garlic.

  4. Heat the oil over medium heat in a medium sized pot. Add the onion and garlic and reduce the heat to low. Cook these very slow, stirring occasionally. They should cook like this until the corn stock is ready.

  5. After 30 minutes taste the corn stock and see if it is sufficiently corny, you may want to cook it a little bit longer, but don't spend more than an hour on this, it won't change much after that amount of time. You should end up with about 6 cups of liquid. If you have less, add some water so that you have 6 cups.

  6. You're going to cook the pasta as if it was risotto. That means stirring constantly and slowly adding more liquid as you go. Here's the step-by-step for that:

    1. Keep the stock on the stove over medium low heat. Add two ladles of stock to the pot with the onions and garlic.

    2. Put all of the pasta in the pot with the onions and garlic and stir constantly.

    3. As the water boils and is absorbed into the pasta you will need to add more, ladle by ladle until the pasta is done. This should take about 5-6 cups and about 20 minutes.

    4. Halfway through this process add the salt and corn kernels that you cut off. Keep stirring and keep adding liquid as needed. There is a lot of starch in the pot so it will stick and burn if you walk away from it.

    5. Check the pasta and make sure it's al dente. Don't give up, I promise you will get there. Add a little more liquid and cook a little longer if it's not there yet. It's OK if you run out of stock and need to add water (if you do, try to get it boiling or at least hot before you add it - microwaves or electric tea kettles come in handy for this).

  7. When the pasta is done cooking take it off the heat. Stir in the chevre and tomatoes.

  8. Slice the chilies into tiny rounds and serve them on the side so people can choose their own level of heat. Be careful not to touch your eyes (or anywhere else) after you touch the chilies!

Enjoy!
-Matt

Photo Aug 30, 5 44 07 PM.jpg
Print Friendly and PDF

Comment

Beef Stir-Fry with Green Peppers, Mushrooms, and Purple Pak Choi

Comment

Beef Stir-Fry with Green Peppers, Mushrooms, and Purple Pak Choi

I'm a big believer in using meat as a flavoring for a lot of vegetables and this dish is a good example of that. It uses 8 oz of sirloin steak, an average restaurant portion, to serve 6-8 people with mounds of delicious vegetables.


Photo Sep 16, 6 48 46 PM.jpg

Ingredients

  • 8 oz sirloin steak, sliced thinly

  • 3 small green peppers, sliced thinly

  • 1 medium yellow onion, sliced thinly

  • 4 heads purple pak choi, cut in 2" sections, hold the greens and the stems separately so that you can add them to the wok at different times

  • large handful of mushrooms, oyster or shiitake, sliced thinly

  • 1 tbs vegetable oil

  • 1 tbs corn starch

  • 1 tsp kosher salt

  • 2 tbs water


  1. Slice the beef and toss with the salt and corn starch. The corn starch will help the beef to get nice and brown when you fry it and help thicken the sauce that will come later.

  2. Prep all the vegetables. Wash the pak choi extra well because it has a tendency to hold onto dirt, especially down near the base where all of the stems come together. The last thing any of us want is a sandy stir-fry.

  3. Heat your wok (or in a pinch a cast iron pan) over high heat with the oil. When it's screaming hot (but before it bursts into flames, seriously this has happened to me) add half of the beef and stir it constantly for a couple of minutes until it is nicely browned on all sides. Take it out and repeat with the other half of the beef. Remove the beef and return the pan to the heat.

  4. You may need to add a little bit more oil. Cook the onions by themselves for a minute, then add the peppers and continue to stir-fry.

  5. After two minutes add the mushrooms and the stem portions of the pak choi. Just keep stirring.

  6. After another two minutes or so taste the vegetables and cook them longer if they aren't done. Add the beef, pak choi leaves, and the water and stir everything together.

  7. Taste and adjust with salt if needed.

Enjoy
-Matt

Print Friendly and PDF
Photo Sep 16, 6 28 44 PM.jpg
Photo Sep 16, 6 45 52 PM.jpg
Photo Sep 16, 6 49 08 PM.jpg

Comment

Roasted Eggplant Dip with Shiso, Ginger, and Tomato

Comment

Roasted Eggplant Dip with Shiso, Ginger, and Tomato

Eggplant is one of my favorite vegetables. It has a depth of flavor that rivals tomatoes but you have to work with it a bit to open it up and unlock that richness. This is a great dish for summer parties as a vegetable dip or it can be spread on bread as an hors d'oeuvre.


Photo Aug 17, 11 41 25 AM.jpg

Ingredients

serves 8-12

  • 6 long, skinny eggplants

  • 1 small yellow onion

  • 4 cloves garlic

  • 1" section ginger

  • 6" stalk lemongrass

  • 4 roma tomatoes

  • 5 shiso leaves

  • 1/2 lime

  • 1 tbs fish sauce

  • 1 tbs vegetable oil

vegetables, baguette, or flatbread for dipping and spreading


  1. Heat the oven on the broiler setting.

  2. Poke the eggplants several times with a fork just deep enough to pierce the skin.

  3. Place eggplant on a heavy baking sheet and broil for 20-30 minutes, rotating as needed until the skin is very dark and the flesh is completely soft.

  4. Place eggplant in a bowl and cover with a plate to allow them to steam.

  5. Meanwhile prepare the other vegetables. Peel and finely dice the onion. Peel the ginger (the best way is with the edge of a spoon) and finely dice. Whack the lemongrass with the blunt side of your knife up and down the stalk to soften the fibers, then finely dice that as well. Peel and finely dice the garlic.

  6. Dice all 4 of the tomatoes, but reserve one separately.

  7. Heat a saute pan over medium heat with the oil. First add the onions and cook until they are soft and fragrant. Continue by adding first the ginger, then the lemongrass, and finally the garlic. Pause between each addition to stir in the new vegetable and allow it to cook a few moments. You don't want these to brown so be careful with the temperature.

  8. Add 3 of the diced tomatoes and half of the fish sauce. Reduce the heat to low and let this simmer while you prepare the rest of the recipe.

  9. Peel the skin off the eggplant and discard the skin. Reserve any juices that came out in the bowl while the eggplant steamed. Puree the eggplant and juices until smooth.

  10. Roll up the shiso leaves and cut into thin shreds. Combine them with the remaining tomato, half of the fish sauce, and the juice of half a lime.

  11. When the vegetables on the stove have cooked down and are mostly dry combine them with the pureed eggplant and tomato/shiso mixture.

  12. Serve at room temperature with multigrain baguette, fresh raw vegetables, or flatbread.

Enjoy
-Matt

Print Friendly and PDF

Comment

Water Spinach Stir Fry with Peanuts, Lime, and Chiles

Comment

Water Spinach Stir Fry with Peanuts, Lime, and Chiles

I've eaten water spinach before, but I've never cooked it. I was really excited to see it in this week's share so I  could see what it's like to cook. Now I want to eat it all the time. Easy to prep, easy to cook, easy and delicious to eat. I found so many recipes and ways to use it when I looked around online. I have a real love for using the stem when cooking greens, which can be challenging with the family of kale, collards, and chard. Water spinach stems though are tender and barely even need to be cooked.


Photo Aug 22, 4 27 53 PM.jpg

Ingredients

serves 4-6

  • 1 large bunch of water spinach

  • 1 tsp vegetable oil

  • 1 tbs miced garlic

  • 2 tbs chopped dry roasted peanuts

  • 1 tbs minced ginger

  • 1 chile pepper, sliced into rings (what kind of pepper you use will depend on what level of heat you want)

  • 1 tsp fish sauce

  • juice from 1/2 lime


Photo Aug 22, 4 21 24 PM.jpg
  1. Prepare all of the ingredients. Wash and cut the water spinach into 3-4 inch sections.

  2. Heat oil in a saute pan or wok over medium high heat until it begins to shimmer.

  3. Add the garlic, ginger, peanuts, and chile to the pan. Saute for 1 minute until fragrant.

  4. Add the water spinach and stir continually until the leaves wilt and the stems are tender.

  5. Add the fish sauce and lime juice and stir to combine.

Enjoy
-Matt

Photo Aug 22, 4 28 02 PM.jpg
Print Friendly and PDF

Comment

Blistered Shishito Peppers with Miso Chevre Dipping Sauce

Comment

Blistered Shishito Peppers with Miso Chevre Dipping Sauce

Shishito peppers are delicious and mild enough (with the occasional surprise exception) to be eaten whole. This is a 5 minute recipe that makes a great snack, appetizer, or side dish. Plus, it's another great reason to break out your cast iron pan!


Photo Sep 06, 2 38 04 PM.jpg

Ingredients

Serves 4-8

  • 1 pound of shishito peppers

  • 1/2 tsp vegetable oil

  • pinch of kosher salt

  • 1/4 cup Decimal Place Farm chèvre

  • 1/4 cup sour cream

  • 1 tbs white miso

  • 1 tsp sriracha

  • 1 tbs rice wine vinegar


Photo Sep 06, 2 33 44 PM.jpg
  1. Heat a cast iron skillet over medium high heat and drizzle a little bit of oil in it.

  2. Add all of the peppers and spread out into a single layer.

  3. Every minute or so toss the peppers around and spread them back out. You have to leave them still long enough to blister and char, and move them around enough so that they cook on all sides. Most importantly don't overthink it, it should take less than five minutes if your pan is nice and hot. It will probably smoke a bit, don't worry, open a window if you need to.

  4. Combine the chèvre, sour cream, miso, sriracha, and vinegar. Mix until smooth.

  5. When the peppers are done toss them with a pinch of salt.

  6. Serve with the dipping sauce.

Enjoy
-Matt

Photo Sep 06, 2 37 44 PM.jpg
Print Friendly and PDF

Comment

Filipino Picadillo (Ground Beef Stew with Potato, Onion, and Tomato)

1 Comment

Filipino Picadillo (Ground Beef Stew with Potato, Onion, and Tomato)

There are many versions of picadillo out there in the world as a result of Spanish colonization. This is the one that my wife cooks at home, that she learned from her mom. It's a family favorite, our middle child eats it breakfast, lunch, and dinner until it's all gone. Thanks to Christine for cooking this and providing this week's recipe. It's a simple recipe so it tastes best with fresh, in-season, tomatoes, potatoes, and onions. 

Ingredients

  • 1 lb ground beef
  • 4 medium potatoes, peeled and diced
  • 1 red onion, peeled and diced
  • 1 large tomato, diced
  • 2 large cloves of garlic
  • 1 tbs fish sauce
  • water or stock
  • some vegetable oil

  1. Heat a heavy bottom pan (cast iron, dutch oven, something like that) over medium high heat with a little bit of oil until it just starts to smoke.
  2. Add the ground beef, spread out to cover the bottom of the pan, sprinkle with a pinch of salt, and leave it alone. You want it to brown really well, and if you stir it around it won't get a chance to do that.
  3. Once the beef has turned a good dark brown on the bottom you can stir it around to brown some more.
  4. Remove the beef from the pan and leave the fat. Saute the onion and the garlic in the fat left behind in the pan.
  5. Add the tomatoes and cook until they start to break down.
  6. Return the beef to the pan, add the potatoes, stir everything together.
  7. Add enough water or stock to cover the ingredients and simmer until the potatoes are soft. It should finish a little soupy.
  8. Season with fish sauce to taste.
  9. Serve over steamed jasmine rice.

Enjoy
-Matt

Print Friendly and PDF

1 Comment

Sweet Potato Galette with Tomato Gravy

Comment

Sweet Potato Galette with Tomato Gravy

A galette is like pie's easy-going and more fun cousin. They are rustic, good-looking, and so much easier to make. This is a savory one, but the same technique works great with fruit fillings too.

IMG_4373.JPG

Ingredients

Serves 4-6

galette filling

  • 1 pound sweet potatoes

  • 2 medium tomatoes

  • 2 small yellow onions

  • 3 tbs unsalted butter

  • 1/2 cup whole milk

  • 1 tsp kosher salt

  • some vegetable oil

galette dough

  • 120 grams all purpose flour (1 cup)

  • 80 grams unsalted butter (1/3 cup)

  • 40 grams ice cold water (2 tbs + 1 tsp)

tomato gravy

  • 4 medium tomatoes

  • 1 large yellow onion

  • 2 tbs butter

  • 2 tbs flour

  • 1/2 cup whole milk

  • 1/2 tsp kosher salt

egg wash

  • 1 chicken egg

  • 1 tbs water


  1. First, make the galette dough.

    1. Cut the butter into small cubes and place in a mixing bowl with the flour.

    2. Working quickly, mash the butter into the flour with your fingertips. Your goal is to mix them thoroughly without melting the butter. The flour should take on a gravelly appearance. Put this back into the freezer for a minute.

    3. Combine some water with a lot of ice to get it very cold. Remove the butter/flour mix from the freezer and add 1 tbs of the ice water, then another. Mix it together until a dough forms. If needed, add the final teaspoon. Form the dough into a disc and wrap in plastic wrap. Let the dough rest in the refrigerator while you prepare the other ingredients.

  2. Start the galette filling.

    1. Cut the sweet potatoes in half and place them cut side down on a lightly greased baking sheet.

    2. Bake in the oven at 375F until soft, about 30-45 minutes.

    3. When they are done, use a spoon to scoop them out of their skins into a mixing bowl. Add 3 tbs butter, 1/2 cup of milk, and 1 tsp of salt. Blend until smooth.

  3. While the sweet potatoes are baking you can slice and roast the tomatoes and onions too. Slice them thinly and evenly, and spread on a lightly oiled baking sheet. Bake in the same oven as the sweet potatoes for about 20 minutes, until the onions start to brown.

  4. With everything in the oven it's time to start the gravy.

    1. Roughly chop the yellow onion and puree in a food processor.

    2. Melt 2 tbs of butter in a sauce pan and add the onion puree. Saute over medium heat until most of the liquid is cooked out and the onions start to caramelize.

    3. Stir in 2 tbs of flour and cook for 2-3 minutes, stirring frequently.

    4. Roughly chop and puree 4 medium tomatoes and whisk into the onion & flour mixture. Add 1/2 cup of milk.

    5. Bring this to a boil while whisking, then simmer for 30-45 minutes while you finish the galette, stirring occasionally.

  5. On a lightly floured surface roll out the dough to about 12" round and 1/4" thick.

  6. Spread sweet potato puree in an even layer in the middle of the dough to 2" from the edge.

  7. Layer the roasted tomato and onion slices on top of the sweet potatoes. Fold the edges of the dough in towards the center.

  8. Mix the egg and water and brush onto the dough.

  9. Bake in a 400F oven for 40-45 minutes.

  10. Allow to cool for a few minutes and serve with the tomato gravy.

Enjoy
-Matt

IMG_4377.JPG
Print Friendly and PDF

Comment