Stuffing Dumpling Soup

Comment

Stuffing Dumpling Soup

A great way to incorporate your Thanksgiving leftovers with frost-tolerant veggies! Sohla incorporates all those ingredients into a clever, delicious, homey soup. A new take on leftovers, why not get creative? If you’ve already eaten all your leftovers, you can easily substitute the turkey carcass with a new bird.

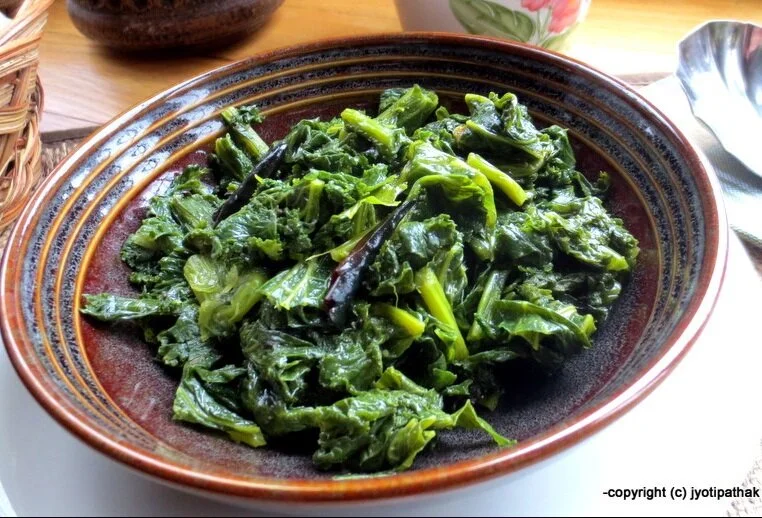
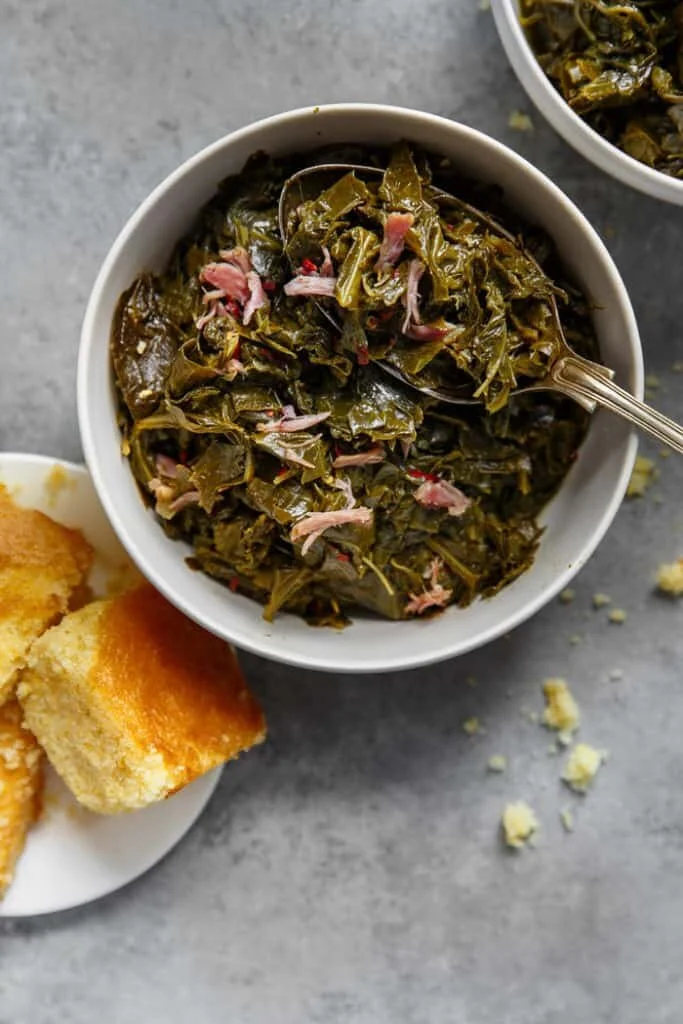
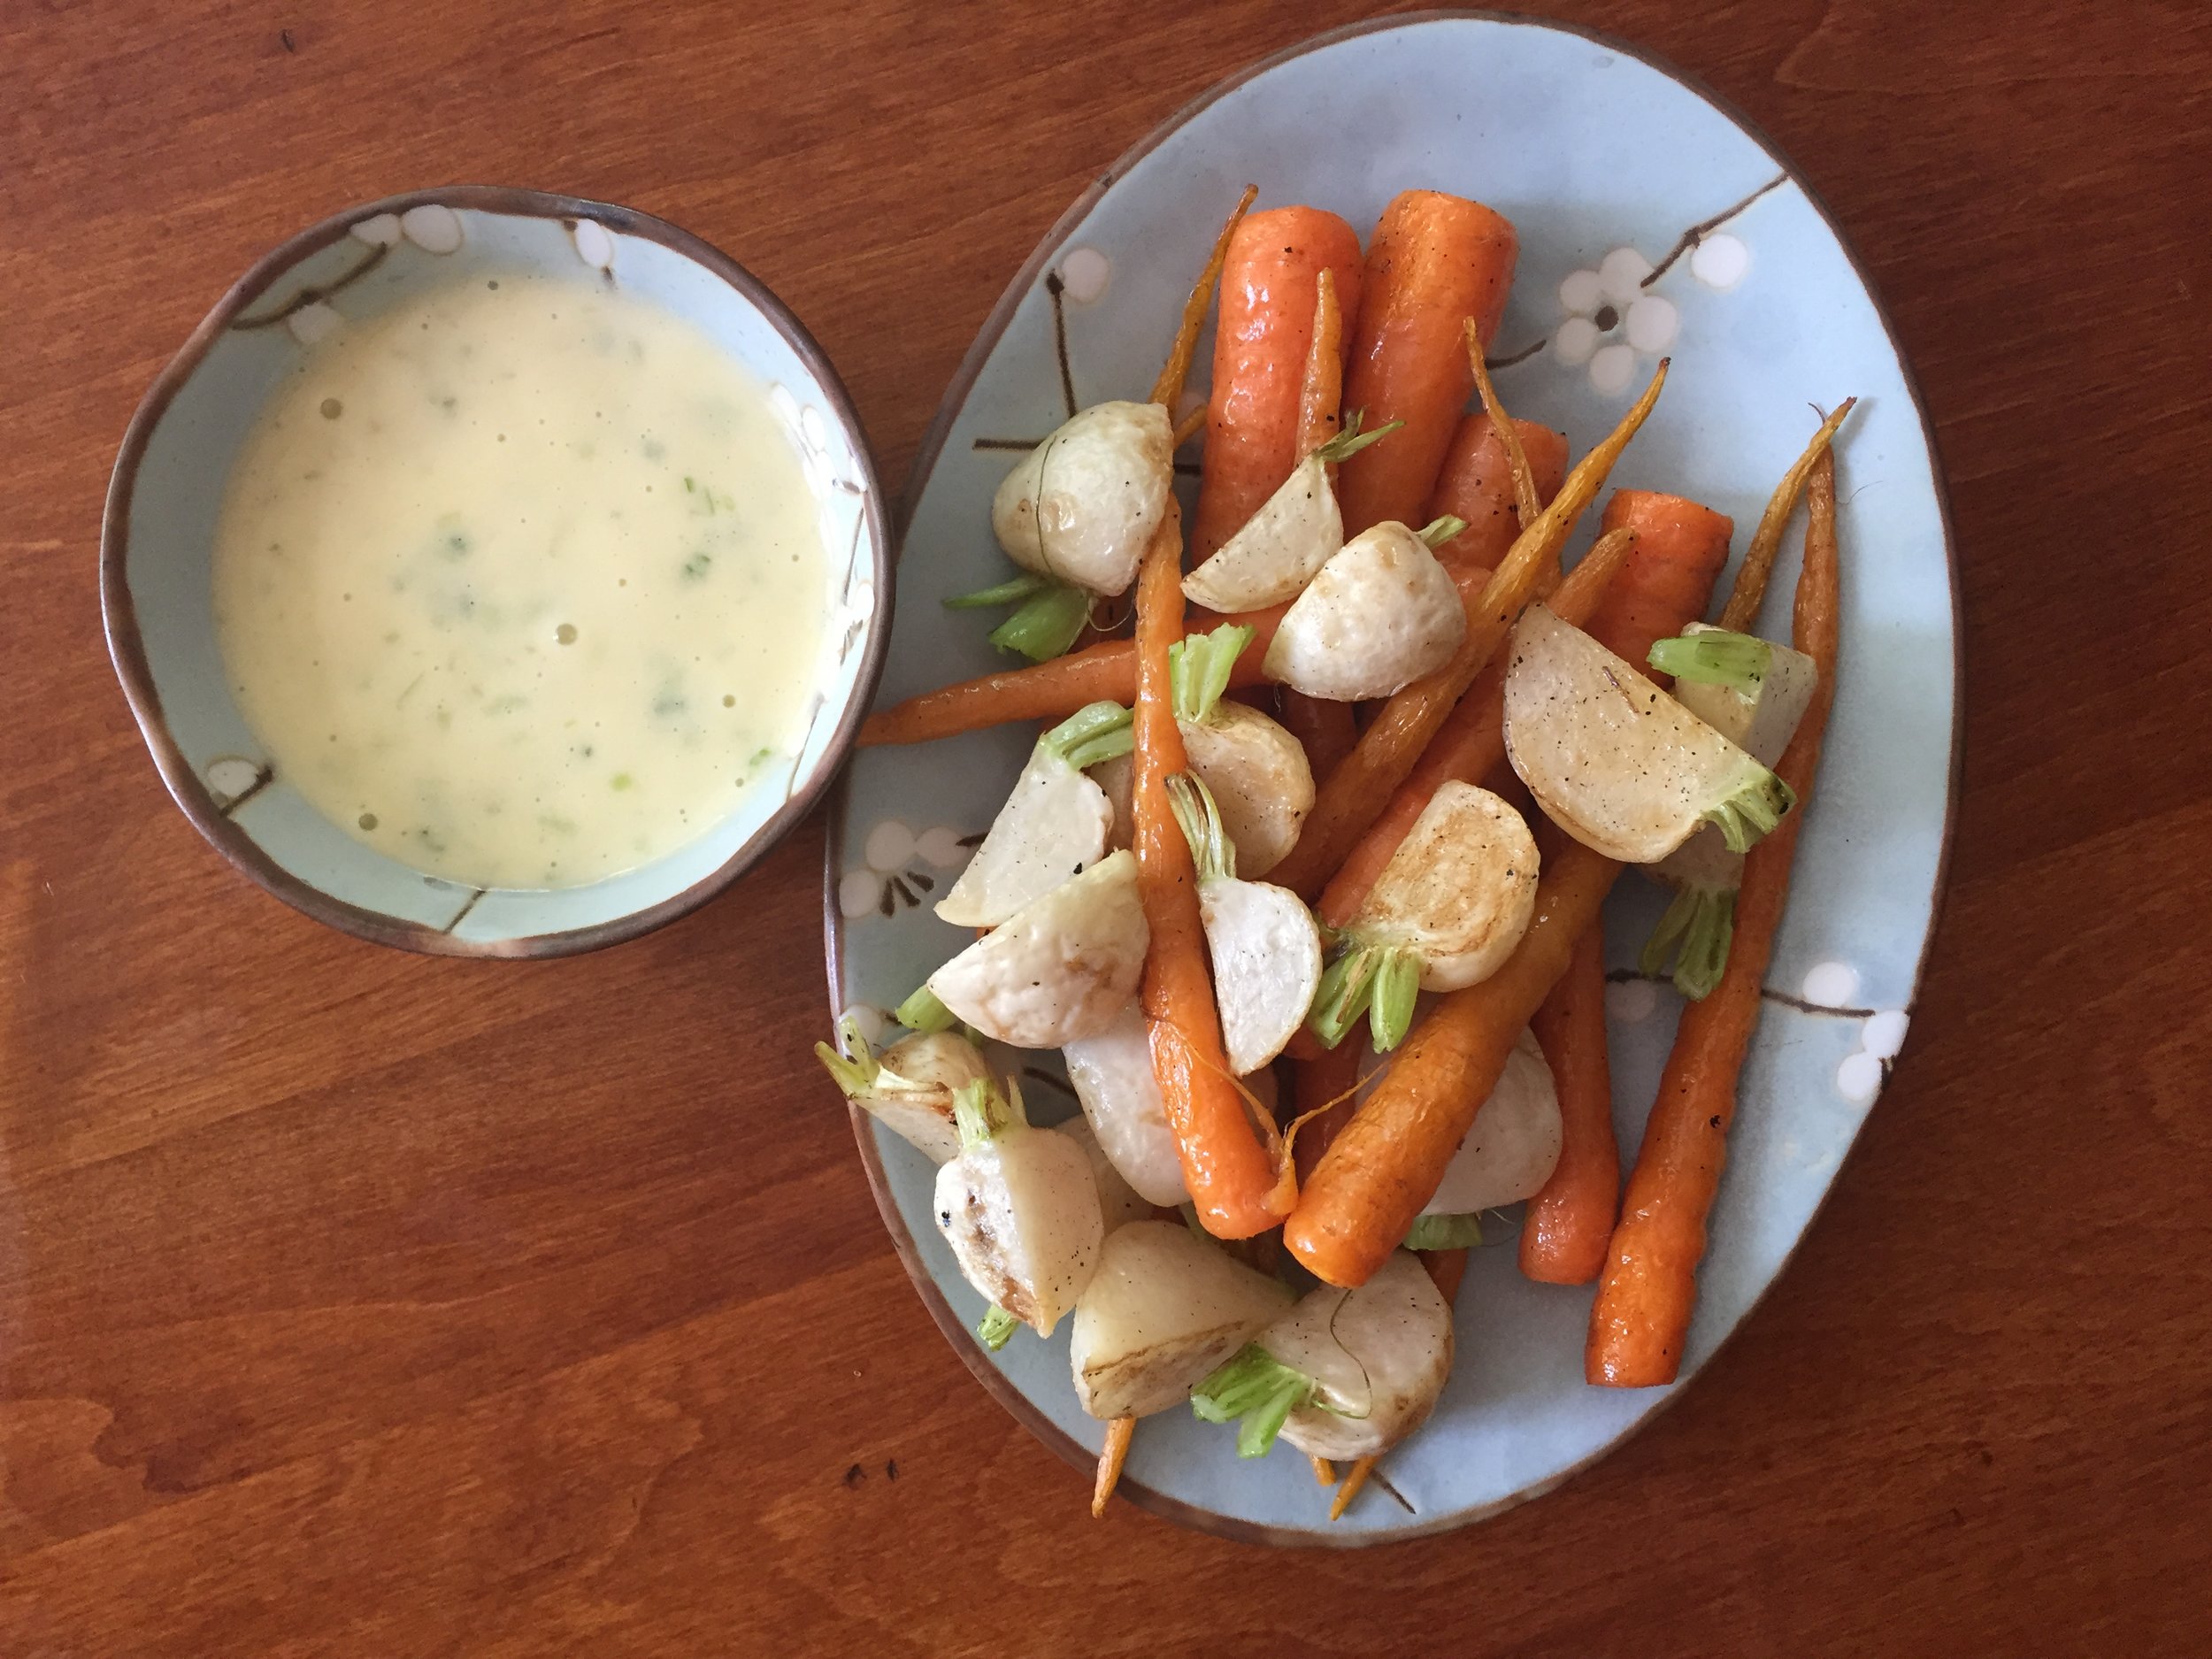
This time of year, we eat frost-tolerant veggies and storage crops that were harvested earlier in the year. For frost-tolerant veggies, this is various hearty greens and crunchy roots like kale, collards, cabbage, chard and carrots, onions, turnips, beets, etc. We also enjoy storage crops like butternut squash, apples, and sweet potatoes. This is what nature designed for us to eat during these cool months to stay nourished and healthful, and what more could we ask for at this time! 

Photo: David Malosh

Photo: David Malosh

Ingredients

Serves 4-6

For the Turkey Stock:

  • 1 turkey carcass, picked clean (about 4 pounds)

  • 1 TBSP apple cider vinegar, plus more to taste

For the Soup:

  • 2 TBSP unsalted butter

  • 2 medium sweet potatoes (about 1 pound), peeled and cut into bite-size cubes

  • 1 medium yellow or white onion (about 10 ounces), chopped

  • Kosher salt

  • 1 pound kale (any type), stripped from stems and coarsely chopped (about 6 lightly packed cups)

  • 4 garlic cloves, smashed, peeled and chopped

  • ½ tsp red-pepper flakes, plus more to taste

  • 2 cups cubed leftover turkey

For the Dumplings:

  • 2 ½ cups leftover stuffing, slightly warmed

  • 2 large eggs

  • ½ cup all-purpose flour

  • ½ tsp baking powder


  1. Prepare the stock: Roughly chop the carcass so you don’t have any pieces bigger than your hands. (This is just so the pieces fit more compactly in the pot — don’t overthink it.) Place in a pressure cooker. Add the vinegar and cover with 2 1/2 quarts water. Bring to full pressure and cook for 1 1/2 hours. Allow the pressure cooker to cool down naturally, pluck out and discard the larger bones, then strain the stock through a fine-mesh sieve, discarding solids. You should have 9 to 10 cups of stock. (You can also prepare the stock on the stovetop in a large pot, simmering for 3 1/2 to 4 hours, and topping off with water as needed.) Leftover stock can be kept in the refrigerator for 3 days or frozen for up to 3 months.

  2. Prepare the soup: In a large Dutch oven or heavy pot over medium-high heat, melt the butter until foamy. Add the sweet potatoes, onion and a big pinch of kosher salt. Cover and cook, stirring occasionally, until the onion is tender and translucent, about 5 minutes.

  3. Add the kale, garlic and red-pepper flakes, and season with a big pinch of kosher salt. Cover the pot and cook until the greens are wilted, about 2 minutes.

  4. Add 2 quarts of the prepared turkey stock and season with kosher salt to taste. Increase the heat to bring the soup to a boil, then reduce to an active simmer and cook, partly covered, until the greens and sweet potatoes are tender, about 20 minutes.

  5. While the soup simmers, prepare the dumplings: In a medium bowl, combine the stuffing and 1/3 cup of the turkey stock, and mash with a potato masher until the stuffing is broken up. Add the eggs, flour, baking powder and a big pinch of kosher salt, and mix until well combined.

  6. Taste the soup and adjust the seasoning to taste with more salt, red-pepper flakes and vinegar, if needed. Stir in the turkey.

  7. Using two big spoons, plop the stuffing mixture into the soup like big drop biscuits. Cover the pot, reduce heat to low, and gently simmer until dumplings feel set and firm, 15 to 20 minutes.

  8. Divide soup across bowls. (If storing leftovers, scoop the dumplings out of the soup and store separately to prevent them from soaking up all the broth as they sit. Dumplings and soup will keep refrigerated for up to 2 days.)

Recipe by Sohla El-Waylly | NY Times Cooking

Print Friendly and PDF

Comment

Roasted Roots with Wasabi Aioli

Comment

Roasted Roots with Wasabi Aioli

Fall is here, winter is coming. The warmth of the oven is a nice touch to a cozy evening meal with family and friends. As the growing season ends, root vegetables and squashes are being harvested after weeks of growing in the ground. The veggies store long on the shelf and in the fridge and roasting them is the most common type of way to prepare these for any meal. Roasting vegetables are so versatile because you can include leeks, potatoes, squash, or even throw in some chicken thighs for you meat lovers. You can enjoy this recipe on its own or as a perfect side dish.

Photo: We Are Cocina

Photo: We Are Cocina

Ingredients

Serves 2-4

  • 3 large carrots (colorful is optional), sliced

  • 2 leeks, white part only, sliced

  • 3-4 small beets (colorful is optional), sliced

  • 1-2 medium kohlrabis, sliced

  • 10 sage leaves

  • olive oil

  • sea salt

  • freshly ground black pepper

For the wasabi aioli

  • 1/2 cup Tahini butter

  • 1 Tbsp Vegan or Reg Mayonnaise

  • 1-2 tsp Wasabi paste (or powder mixed with water)

  • 2 sprigs Scallion, green part only, sliced

  • 1 garlic clove

  • 2 Tbsp lemon Juice

  • 2 Tbsp water

Garnish (optional)

  • Black sesame

  • Arugula


  1. Preheat the oven to 400°C/200°F. Put the roots and sage leaves in a large baking tray lined with baking paper. Drizzle olive oil, sprinkle salt and pepper, and roast for 25-30 minutes, until the roots are tender.

  2. Meanwhile make the wasabi aioli.

  3. Put all the aioli ingredients in a jar, measuring cup, or small blender. Using a hand blender blitz them into a smooth and creamy paste. Taste and correct seasoning, you’ll might need to add salt if you’re using a type of tahini that isn’t salted at all. Some Middle Eastern tahini butter is naturally salted.

  4. To serve, put a spoonful of aioli on flat plates. Using the back of the spoon, spread the aioli, in circle movements into a ring. Put some roasted roots in the middle of the ring and garnish; sprinkle black sesame over and plant the arugula leaves in the paste.

  5. Enjoy!

Recipe by Shelly Gilad | We Are Cocina

Print Friendly and PDF

Comment

Francis Lam’s Ginger Scallion Sauce

Comment

Francis Lam’s Ginger Scallion Sauce

Green onions are SO versatile. Many Asian households have these always on hand and we’re seeing more and more recipes incorporate them into their dishes. Green onions can serve as a garnish, or add a mild flavor of onions or chives, depending on the recipe. Their sweet vegetal flavor and mild acidity helps you achieve a fresh, bright, and complex flavor. Chop them julienne style or in tiny slivers, green onions will add that touch of green that might be missing in your next dish.

Green onions are also really easy to grow and cultivate at home! Just chop off the root ends (the ones that you don’t eat anyways), and put them in soil or in a water. Now you’ll have your own supply of green onions to use!

The sauce in the recipe below can be used for a variety of dishes -- mix with any type of noodle, top grilled meats or veggies, add it to a fried egg and rice dish. If you’re on the chili crisp bandwagon, that will take this sauce to the next level!

Photo: Quentin Nardi | Splendid Table

Photo: Quentin Nardi | Splendid Table

Ingredients

Yields 2 Cups

  • 2 ounces ginger (about a 3-inch piece), peeled and cut into 1/2-inch chunks

  • 6 ounces scallions (1 large or 2 small bunches), cut into 1-inch lengths (can sub for green onions)

  • 2 teaspoons sea salt, plus more to taste

  • 1 cup peanut oil (or any vegetable oil)


Note: Use a large bowl, much larger than you think as the sauce will bubble up!

  1. Place the ginger in the bowl of a food processor and process until the ginger is finely minced but not mushy. Scrape it into a large, tall, heatproof bowl.

  2. Add the scallions to the processor and mince until they are the same size as the ginger. Scrape them into the bowl with the ginger.

  3. As Francis says, “Salt the ginger and scallions like they called your mother a bad name and stir it well.” It should taste a little too salty.

  4. Heat the oil in a pan until it begins to smoke, then pour it into the large bowl with the ginger and scallions. Stir lightly. Let cool to room temperature and serve. Keeps 2-3 weeks covered and refrigerated.

Recipe by Francis Lam | Splendid Table

Print Friendly and PDF

Comment

Raayo ko Saag (Nepali-style Mustard Greens)

Comment

Raayo ko Saag (Nepali-style Mustard Greens)

Mustard greens are among the most popular cool season crops that you will find around Global Growers Network gardens, grown by many different cultures. A key winter green eaten all over Nepal, you can eat the leaves or even the young mustard shoots. Like all brassicas, mustards are a nutrient-dense food, and they are also known for having a bit of a kick or spiciness. The greens become soft and delicious when cooked. In traditional Nepalese cooking, they are cooked as simply as possible with very little seasoning. “No matter how you cook, it is important not to overcook because you want to preserve the fresh flavor of the greens. Nepalese never add water while cooking greens. It is cooked only with the water that clings to the leaves after washing.” - Jyoti Pathak

Photo: Jyoti Pathak | Taste of Nepal

Photo: Jyoti Pathak | Taste of Nepal

Ingredients

Serves 4-6

  • 2 to 3 bunches fresh mustard greens (about 2 pounds)

  • 3 TBSP mustard oil (or any oil of your choice)

  • 1/4 tsp ajowain (carom) seeds

  • 2 dried red chilies, halved and seeded

  • 2 medium clove fresh garlic, minced

  • 1 1/2 tsp minced fresh ginger-garlic paste (equal parts ginger and garlic pounded in a mortar)

  • Salt to taste


  1. Tear the mustard greens into bite-sized pieces. Rinse the torn mustard greens in cold water. Drain and reserve.

  2. Heat the oil in a heavy saucepan over medium-high heat, until faintly smoking. Add the ajowain seeds and dried chilies and fry until lightly browned and fragrant, about 5 seconds.

  3. Add the mustard, garlic, ginger and salt. Cover the pan and cook, stirring occasionally, until the greens become tender and most of the liquid evaporates, 10 to 12 minutes.

  4. Transfer the greens to a serving dish and serve immediately. Perfect to be served alongside rice and curry!

Recipe from Jyoti Pathak | Taste of Nepal

Print Friendly and PDF

Comment

Quick-Braised Greens with Bacon and Sweet Onions

Comment

Quick-Braised Greens with Bacon and Sweet Onions

Photo: Aida Mollenkamp | Food Network

Photo: Aida Mollenkamp | Food Network

Ingredients

Serves 4-6

  • 1 1/2 pounds collard greens or any green variety, washed, trimmed, and roughly chopped

  • 4 ounces bacon, sliced crosswise into 1/2-inch pieces

  • 3/4 cup minced sweet onions

  • 1 1/2 cups low-sodium chicken broth

  • Salt and freshly ground black pepper


  1. Bring a large pot of heavily salted water to a boil. When water boils, add greens and cook until wilted and tender, about 5 minutes. Drain and set aside.

  2. Place bacon in a large frying pan and cook over medium-high heat, stirring occasionally, until browned and fat is rendered, about 3 minutes. Add onion and cook until softened, about 4 minutes. Add greens and turn to coat well. Add broth - it should cover greens and let cook until broth is reduced and greens are very tender, about 15 minutes. Season with salt and freshly ground black pepper and serve.

Recipe from Aida Mollenkamp | Food Network

Print Friendly and PDF

Comment

Green Curry with Chicken

Comment

Green Curry with Chicken

Thai eggplant is green! Not your usual purple like most people are familiar with. They are known as “round eggplants” or “ma keua praw” in Thailand. The texture is denser and crunchier with a slight bitter taste, so the preparations will be different. You can stir fry them, or eat them raw with a spicy dip. Thai eggplants are the most popular ingredient in red and green curries. Slice them thinly and they’ll absorb the flavor and aroma of the other ingredients, in addition to becoming tender more quickly.

Photo: Thai Table

Photo: Thai Table

Ingredients

Serves 2-3

  • 1 lb chicken (cooking with the bones will add more flavor)

  • 1 thinly sliced chili pepper

  • 1 cup coconut milk

  • 1-2 Tbsp *green curry paste

  • 6-7 Thai eggplants (quartered)

  • 2 Tbsp fish sauce

  • 4-5 kaffir lime leaves (ok to omit if you can’t find it!)

  • 1/4 cup pea eggplant (ok to omit if you can’t find it!)

  • 1 Tbsp sugar

  • 3 sprigs Thai basil

  • 1 cup water


Note*

  • Some brands of green curry paste can be very spicy hot. Start with one tablespoon first before increasing the amount.

  • Green curry should not be sweet like dessert but should have a hint of sweet.

  • If you curry paste is old or not quite green, add a few ground  fresh pepper leaves in.  If fresh pepper leaves are not available, use mild leafy green instead. This will give you beautiful fresh green without the heat like chili pepper would.

  1. Into a pot over medium heat, pour half of the coconut milk and green curry paste. If your coconut milk separates and has cream on the top, use the cream. Mix the paste with coconut milk well.  Keep stirring to prevent bottom from sticking and burning.  You may need to lower the heat if it splatters too much.  Keep stirring until you see greenish oil form. The coconut oil is pulling the color and fragrance out from the spices.  This green oil will be floating beautifully in your curry, like in picture 5 (click it to make it bigger).

  2. Add chicken into the curry mixture.  Stir to coat the chicken for a couple minutes, until it is partially cooked. 

  3. Add the eggplants, but hold off on the pea eggplants. Stir more.

  4. Add the rest of coconut milk and 1 cup of water. Let it simmer for 10 minutes or until the chicken is fully cooked.  

  5. Add the pea eggplants.  Add the seasonings, fish sauce and sugar. Taste for the balance flavors, salty with a hint of sweet.  Add the slivers of red chili pepper and kaffir lime leaves.  

  6. Let it boil one more time.  When you are ready to serve, add the Thai basil. Stir to mix the basil in and immediately turn off the heat to keep the basil green. Quickly pour onto serving bowl.

  7. Serve with rice or thin rice noodles.

Recipe from Natty Netsuwan | Thai Table

Print Friendly and PDF

Comment

Sweet Potato Hash

Comment

Sweet Potato Hash

Mmmm sweet potatoes. How can you not think of fall when it comes to these? Not only does the color fit in perfectly with fall, but the sweetness makes this vegetable kid-friendly.  Sweet potatoes are also higher in fiber than regular potatoes and packed with Vitamin A.  Domesticated in Central and South America, sweet potatoes have also been found historically in Polynesia and New Zealand.  This versatile vegetable can now be seen all over the world as a staple crop.  Roast them, bake them, or mix them with regular potatoes and root vegetables.  Enjoy this wonderful fall veggie! This is an attempt to write down Tabitha’s recipes as they are only available through her awesome videos!

Photo: Tabitha Brown via video

Photo: Tabitha Brown via video

Ingredients

Serves 4

  • 2-3 large sweet potatoes (cut in medium pieces)

  • 2-3 Tbsp grape seed oil (or any oil)

  • 2 tsp garlic powder

  • cilantro leaves

  • salt and pepper to taste

  • 1 yellow bell pepper (diced)

  • 1 orange bell pepper (diced)

  • 2-3 cups of spinach (your preference)

  • Sliced avocados (optional)

  • Salsa (optional)

  • Lemon pepper Parmesan (optional)


  1. Blend sweet potatoes into food processor.  You can keep the skins on or peel the potatoes, your preference.  If you do not have a food processor, finely dice the sweet potatoes.  (The smaller the pieces, the faster the cook).

  2. Add sweet potatoes and oil to skillet and sauté for a couple of minutes.

  3. Add garlic powder, cilantro leaves, salt and pepper.  Mix and cover for about two minutes.  

  4. Once potatoes are soft, add diced peppers and spinach.

  5. Once spinach has wilted, transfer to plate.

  6. Optional: top with avocado slices, salsa, and lemon pepper Parmesan.

Recipe from Tabitha Brown

Print Friendly and PDF

Comment

Orecchiette with Butternut Squash and Sage

Comment

Orecchiette with Butternut Squash and Sage

Butternut Squash. One of the most popular fall squashes in the US. After weeks of patiently watching the plant grow, one squash makes a hearty meal. The veggie can be mashed, roasted, cooked in soups or stews, added in pastas or salads, and on and on it goes. For those that lack the motivation in the kitchen to peel or cut up the squash, don’t hesitate to cook it with the skin on. The skin is edible, but also peels away easily once cooked if you prefer to not eat it. The creaminess also makes it a great base for vegetarian and vegan recipes. Don’t forget that you can also clean and toast/roast your seeds! 

Photo: Martha Stewart

Photo: Martha Stewart

Ingredients

Serves 4

  • Coarse salt

  • 12 ounces orecchiette

  • 2 Tbsp extra-virgin olive oil, plus more for drizzling

  • 1 small butternut squash, halved and peeled, seeds and pulp scooped and reserved, flesh cut into 1/2-inch pieces (4 cups)

  • 3 Tbsp unsalted butter

  • 1/4 cup packed fresh sage leaves

  • 1 1/3 cups whole-milk ricotta, for serving

  • Poppy seeds, for serving


  1. Bring a large pot of generously salted water to a boil. Cook pasta until al dente. Reserve 1 cup pasta water; drain.

  2. Meanwhile, heat oil in a large straight-sided skillet over medium heat. Add squash seeds and pulp. Cook, stirring occasionally, until seeds puff and turn golden, 10 minutes. Season with salt; transfer to a plate. Add 2 tablespoons butter to skillet; melt. Add sage and cook, stirring occasionally, until crisp, 2 minutes. Transfer to another plate. Add squash flesh to skillet. Season with salt, cover, and cook, stirring occasionally, until tender, 10 minutes.

  3. Stir in pasta, 1/2 cup pasta water, and remaining 1 tablespoon butter. Simmer until thickened slightly, about 2 minutes. Add more pasta water, a few tablespoons at a time, until pasta is evenly coated; season with salt. Top with squash pulp and seeds, sage leaves, ricotta, and poppy seeds. Drizzle with oil and serve.

Recipe from Martha Stewart

Print Friendly and PDF

Comment

Pac Choi Salad with Toasted Sesame Dressing

Comment

Pac Choi Salad with Toasted Sesame Dressing

Pac Choi is a type of Chinese cabbage, also known as Bok Choy. Literally translated to “white vegetable,” you can find many varieties at today’s market. Larger varieties have a thicker white stem, while others are a single shade of light green. Extremely versatile, you can sauté this veggie in your standard stir-fry, steam it, eat it raw, or even toss into your warm ramen noodle bowl. The veggie keeps it bright color after cooked, so it’s a refreshing and vibrant, healthy side dish to any meal.

Photo: Chihyu | I Heart Umami

Photo: Chihyu | I Heart Umami

Ingredients

Serves 4

  • 12 oz. baby bok choy or pac choi

  • 2 -3 Tbsp Paleo Creamy Roasted Sesame Dressing (makes 1/2 cup):

    • 1 Tbsp white sesame seeds

    • 4 Tbsp Paleo or regular mayonnaise

    • 1.5 Tbsp rice vinegar

    • 3 Tbsp coconut aminos (optional)

    • 1/2 to 1 tsp toasted sesame oil

    • 2 tsp tahini


For Sauce (can be made ahead of time):

  1. In a dry cast iron skillet, add the sesame seeds and toast over low heat for about 2-3 minutes. Stir the seeds often with a spatula or gently rock the skillet back-and-forth to keep the sesame from burning.

  2. Off heat, grind the seeds with a pestle and mortar (or a clean coffee grinder) until smooth.

  3. In a medium-size bowl, add all the ingredients from sesame seeds to tahini. Whisk and stir until creamy smooth. Taste and make seasoning adjustments to your own liking.

  4. For thinner texture, add ½ tbsp water a time until desired consistency.

Note: Store in the fridge. The texture will become thicker after refrigerated. Thin with more water.

For Pac Choi:

  1. Bring a large pot of water to boil.

  2. In the meantime, halve or quarter the baby bok choy (pac choi). Rinse them under tap water to remove dirt hidden inside the layers.

  3. Blanch them in hot boiling water for about 1-1.5 minutes. Use a large slotted spoon to scoop out the bok choy (pac choi) and shock them in cold water. The bok choy (pac choi) will remain crunchy this way.

  4. Gently squeeze the bok choy (pac choi) to remove the water. Place them over a serving dish. You can place them either cut side up or down. Personally, I prefer cut side up.

  5. In a bowl, spoon the sauce over the bok choy (pac choi) one tablespoon at a time until your desired quantity. The more sauce the stronger the flavor it will be.

  6. Serve at room temperature or chilled.

Recipe from Chihyu | I Heart Umami

Print Friendly and PDF

Comment

Gai Lan (Chinese Broccoli) with Oyster Sauce

Comment

Gai Lan (Chinese Broccoli) with Oyster Sauce

Gai Lan, or also known as Chinese Broccoli, is closely related to regular broccoli, cauliflower, and cabbage. This veggie is widely eaten in Chinese, Vietnamese, and Thai cuisine. It’s best after a quick steam, sauté, or stir-fry. If you have any recipes that call for broccoli rabe leaves, you can easily use Gai Lan. Similarly if your recipes calls for the thick stem of broccoli, Gai Lan is a good substitute as well. Below is a quick, classic appetizer recipe with oyster sauce. It’s one of the green dishes they serve at dim sum, a nice healthy alternative to compliment all those delicious dumplings and meaty entrees.

Photo: Sarah | The Woks of Life

Photo: Sarah | The Woks of Life

Ingredients

Serves 4

  • 1 bunch fresh Gai Lan (Chinese broccoli), trimmed and washed

  • 1 Tbsp vegetable oil

  • oyster sauce


  1. Boil 2 quarts of water in your wok or a large pot and add the oil directly to the water.

  2. When the water reaches a good raging boil, place the stalks in the water carefully so as not to splash. Depending on how much you have, you may want to work in two batches.

  3. Use tongs or a pair of chopsticks to submerge the veggies completely and cook for a couple minutes, until tender but still a bit crunchy. If you like the veggies soft, leave them in a bit longer.

  4. Use a pair of tongs or chopsticks to take the veggies out of the water. Carefully shake off excess liquid and arrange the Chinese broccoli on a plate. Once they are all on the plate, you can drain any excess water that may have pooled on the plate.

  5. Drizzle a couple tablespoons oyster sauce evenly over the veggies and serve!

Recipe from Sarah | The Woks of Life

Print Friendly and PDF

Comment

Thai Eggplants & Chickpeas in Peanut Masala

Comment

Thai Eggplants & Chickpeas in Peanut Masala

This recipe is highly flexible in terms of cooking with various types of eggplants. You can use 1 whole traditional large eggplant, small Thai, or small African eggplants. If you want spice, there’s nothing better than the spice combinations found in Masala. A true blend of cultures, this dish can be served over rice. If you’re not a vegetarian, just add beef or lamb when the eggplants are simmering. Enjoy!

Photo: Susan Voisin | Fatfree Vegan Kitchen

Photo: Susan Voisin | Fatfree Vegan Kitchen

Ingredients

  • 2 tsp coriander seeds

  • 1 tsp cumin seeds

  • 2 tsp sesame seeds

  • 2 medium onions, chopped

  • 2 small tomatoes

  • 2 Tbsp peanut butter (natural for vegan)

  • 2 cloves garlic

  • 2 tsp ginger paste (or 1 tsp minced fresh ginger)

  • 1/2 tsp turmeric

  • 1 tsp red chili pepper or cayenne to taste

  • 1/4 tsp cinnamon

  • 1/8 tsp cloves

  • 1 tsp tamarind concentrate

  • 2 Tbsp coconut (dried, fresh, or frozen)

  • 1/2 tsp agave nectar or sugar

  • salt to taste

  • 10-12 Thai or African eggplants (or 1 large eggplant)

  • 1 cup cooked chickpeas


  1. In a dry, non-stick skillet, toast the coriander, cumin, and sesame seeds until the sesame seeds begin to turn golden, about 1-2 min. Be careful not to burn them. Remove from pan and let cool. Then transfer to a blender or grinder and grind to a paste.

  2. Add onions to pan and cook until they begin to brown. Transfer to a food processor and add the ground spices and all remaining ingredients except the eggplant and chickpeas. Puree to a smooth paste.

  3. Remove the stems of the eggplants and cut them into quarters. In a skillet, add the eggplants, and cook, stirring, until they begin to brown on the outside. Add the spice paste, the chickpeas, and 1/2 cup of water. Stir well and cover. Simmer, adding more water if the sauce seems to thick, until the eggplants are tender. (The time will vary depending on the eggplants you use, but count on at least 15 minutes.) Garnish with chopped parsley or cilantro, if desired, and serve over rice.

Recipe from Susan Voisin | Fatfree Vegan Kitchen

Print Friendly and PDF

Comment

Chinese Boiled Peanuts

Comment

Chinese Boiled Peanuts

Peanuts! Peanuts! Get your peanuts here! From Thai peanut sauce to East African peanut soup, most Southerners are familiar with the boiled peanuts. Green or raw peanuts are those that have been harvested straight out of the ground are are still moist in the shell. Southern style boiled peanuts are the most famous recipe for raw peanuts. If you’re looking to add more spice and flavor, try this Chinese version!

Photo: Bill | The Woks of Life

Photo: Bill | The Woks of Life

Ingredients

Serves 6-7

  • 1 lb fresh green/raw peanuts, in the shell 

  • 5 1/2 cups water (or enough to submerge the peanuts)

  • 2 1/2 tsp sea salt (or to taste; add more if you like them salty)

  • 2 1/2 tsp Sichuan peppercorns

  • 1 small cinnamon stick

  • 2-3 bay leaves

  • 1-2 star anise pods


  1. Soak the peanuts in water for 30 minutes to loosen any dirt still clinging to the shells. Wash them thoroughly and drain. Repeat as necessary until the soaking water is clear.

  2. Using your thumb and index finger, crack open one end of each peanut (the pointier side is easier to crack open) by lightly pressing it. This is so the brine can get inside the peanut shell.

  3. Put the peanuts in a medium pot along with water so the peanuts are totally submerged. Add sea salt (or to taste), Sichuan peppercorns, small cinnamon stick, bay leaves, and star anise pods (use 1 for a lighter flavor or 2 for stronger flavor).

  4. Bring the peanuts to a boil, cover, lower the heat, and simmer for 45 minutes to 1 hour. This will produce a slightly al dente peanut, which is the way we like it. Increase the time if you like your peanuts softer and periodically taste test test to check the consistency.

  5. Turn off the heat and leave the cover on; they will continue to cook and absorb the flavors of the briny liquid. Let the boiled peanuts cool to room temperature. It’s best to let them soak overnight in the refrigerator and eat them cold.

Note: As you eat your Chinese boiled peanuts, remember to keep any leftover peanuts in the brining liquid or they will turn dry! When you’re ready to eat your peanuts, drain and enjoy.

Recipe from Bill | The Woks of Life

Print Friendly and PDF

Comment

Butternut Squash Ginger Chicken Stir Fry

Comment

Butternut Squash Ginger Chicken Stir Fry

Want a colorful, flavorful, new twist to your stir fry? This recipe is highly adaptable to any type of squash and you can mix and add various other vegetables as well. Great for a quick dinner for those that want to make a home-cooked meal, but pressed for time.

Photo: Julia Mueller | The Roasted Root

Photo: Julia Mueller | The Roasted Root

Ingredients

Serves 4

  • 2 Tbsp olive oil

  • 2 cups butternut squash peeled and chopped (can substitute for kabocha, pumpkin, or acorn)

  • 2 large carrots peeled and chopped

  • 1/2 red bell pepper

  • 1/2 yellow onion diced

  • 4 cloves garlic minced

  • 2 cups mushrooms quartered

  • 1 large crown broccoli chopped into florets

  • 1 (1.5-inch) nub ginger peeled and grated

  • 1 large chicken breast cut into strips

  • 1 tsp dried basil

  • 1/4 tsp ground cinnamon

  • 2 tsp fish sauce or other stir fry sauce optional

  • 1/2 tsp sea salt to taste


  1. Heat the oil over medium in a large wok or skillet. Add the butternut squash and carrots and stir well. Cover and cook 4 to 5 minutes, until vegetables begin to soften.

  2. Add remaining veggies (including ginger), cover, cook 1 minute. Remove cover and cook 2 minutes uncovered.

  3. Scoot veggies off to side to make room for the chicken. Add chicken, basil, and sea salt. Brown chicken 2 - 3 minutes until mostly cooked through then stir into rest of stir fry. Cover and cook 5 minutes, or until chicken is cooked through.

  4. Add fish sauce or other stir fry sauce and sea salt. Cook, stirring occasionally, until much of liquid has burned off, about 2 to 3 minutes.

  5. Serve stir fry with choice of side dish and enjoy.

Recipe adapted from Julia Mueller | The Roasted Root

Print Friendly and PDF

Comment

Southern Collard Greens - Soul Food Style

Comment

Southern Collard Greens - Soul Food Style

If you live in the South, you know Collard Greens are an essential piece of comfort food. Although some people do a quick braise in the skillet, this authentic soul food collard greens are “slowly braised in a savory meat are braised in a savory meat flavored and perfectly spiced pot liquor resulting in an amazing tender silky texture.” - Jocelyn, Grandbaby Cakes. A delicious side to any meal! If you have time on your hands, why not?

Photo: Jocelyn | Grandbaby Cakes

Photo: Jocelyn | Grandbaby Cakes

Ingredients

Serves 8 | Cooking time: 2hrs 45min.

  • 6 small bunches collard greens

  • 1 extra large smoked ham hock make sure it is meaty! or smoked turkey

  • 2 tbsp granulated sugar

  • 1 tbsp bacon grease

  • 1 tbsp seasoned salt

  • 2 tsp worcestershire sauce

  • 2 tsp apple cider vinegar

  • 1 tsp crushed red pepper flakes you can go down on this to 1/2 teaspoon if you like less heat.

  • 1/4 tsp garlic powder

  • 1/4 tsp paprika

  • 1/4 cup finely chopped onion


  1. You’ll need a very large pot!!

  2. Start by pulling and tearing greens away from stems. Take a hand full of greens, roll them up and cut the rolls horizontally into small pieces. We personally remove the stems but this is a personal decision.

  3. Next, add greens to empty clean sink and wash them removing all grit, sand and debris thoroughly with cold water until water becomes clear.

  4. Next rinse the ham hock very well then add to a large pot along with enough water to fully submerge the ham hock then cover with a lid. Cook over medium high heat for about 45 minutes or until ham hock is near being tender.

  5. Once ham hock is almost tender, add greens and about 4-5 additional cups of water or enough to just barely cover greens to the pot. This will become your pot likker.

  6. Add along the rest of the ingredients to the pot and cook while covered for at least 2 hours or until completely tender. Most water should have evaporated by this point just having enough to barely cover the greens.

Recipe from Jocelyn, Grandbaby Cakes

Print Friendly and PDF

Comment

Customizable Quick Pickle Recipe

Comment

Customizable Quick Pickle Recipe

Quick pickles are a great way to put your extra veggies to use! You can pickle just about anything, and it’s an excellent addition or side to sandwiches, salads, or a snack. They last for weeks and enable you to enjoy vegetables all throughout the year.

Most pickling recipes call for a combination of vinegar, water, sugar, salt, and a variety of herbs.  This is your brine.  You can use the same brine for a variety of vegetables, or create special brines for special vegetables with their own unique blend of herbs.  The possibilities are endless!

Photo by Jeff Roffman | The Kitchn

Photo by Jeff Roffman | The Kitchn

Ingredients

Serving Size: 2 quarts (2 large 32 oz. mason jars)

Brine 

  • 1 ½ cups of vinegar (can be white, apple, or rice or a combo)

  • 2 ½ cups of water 

  • ¼ cup of salt

  • 2 TBS white sugar

  • Optional: 2-3 peeled cloves of garlic, fresh ginger thinly sliced

Vegetables of your choice (about 2 pounds total)

  • Thinly sliced matchsticks: red onions, beets, carrots, turnips, cucumber, asparagus, summer squash

  • Sliced like coins: carrots, cucumber, asparagus

  • Whole: beans, okra, dill cucumbers, baby carrots, cherry tomatoes

  • **Note on color: garlic might turn blue due to minerals in the water or your pots; to keep green veggies green, do a quick blanch in hot water before pickling

Herbs of your choice (about ⅓ - ¼ cup total)

  • Dried: bay leaves, thyme, dill, rosemary, oregano

  • Fresh: dill, thyme, oregano, rosemary

  • Whole: Peppercorns, Coriander seeds, mustard seeds, red pepper flakes, fennel seeds

  • Ground spices: turmeric, smoked paprika (good for color and flavor)


Photo by Tieghan | Half Baked Harvest

Photo by Tieghan | Half Baked Harvest

Example combinations:

  • Brine + Cucumbers + garlic, dill see, red pepper flakes

  • Brine + Carrots + coriander, ginger, turmeric, thyme

  • Brine + Green Beans + garlic, fresh dill

  • Brine + Cherry Tomatoes + peppercorns, garlic

  • Brine + Squash + red onions, garlic


  1. Rinse your jars!  Just in case.

  2. Cut desired vegetables into shape.

  3. Divide and put herbs and optional garlic/ginger amongst your jars.

  4. Add your vegetables to the jars.  Leave about 1/2 inch of space from the top.  Pack as many as you can without smashing.  Time to test your Tetris skills.

  5. Make your brine!  Pour ingredients into a pot over high heat.  Stir until sugar and salt are dissolved.

  6. Pour brine over vegetables into jars.  It’s ok if you don’t use all the brine!

  7. Tap the jars to release any air bubbles.  Screw lid on tight and let jars cool to room temperature before placing them in the refrigerator.  

  8. Pickled vegetables’ flavor will improve with time.  Wait at least 2 days before tasting!

Adapted recipe from Foodal, Half Baked Harvest, and The Kitchn

Print Friendly and PDF

Comment

Nam Prik Pao: Thai Chili Paste

Comment

Nam Prik Pao: Thai Chili Paste

Thai Chili Paste is that spicy paste you see in every Thai restaurant. Perfect to add on just about anything with a little bit of heat and tanginess. You can adjust the spiciness by removing the seeds, using less chilies, or even substituting with other chilies like Bird’s Eye. Anyway way you make it, this paste will definitely spice up your usual foods and wake up your taste buds! I’m drooling already.

Photo: Romain | Glebekitchen

Photo: Romain | Glebekitchen

Ingredients

  • 3/4 cup thai dried chilies or similar

  • 8 cloves garlic unpeeled

  • 2 large shallots unpeeled

  • 1/4 cup vegetable oil

  • 1 tsp fish sauce

  • small drizzle sesame oil (optional)


  1. Turn on your vent hood. This is going to get intense. Toss the chilies into a skillet and toast them over low heat. You don't want them to burn so keep your heat fairly low. They should be done after about 4 or 5 minutes. Let them cool.

  2. Slice your shallots in half. Put them in a cast iron pan, cut side down, over medium heat. Add the garlic. Dry roast until the shallots start to char. While that's happening flip the garlic every minute or so.

  3. When the shallots are charred (check them - there's no other way) flip them over. Keep flipping your garlic. When it's all soft remove from heat and let cool. Remove the peels on both the garlic and shallot.

  4. Now the fight starts. It is not easy to puree this stuff. You can use a small food processor. That works. Kind of. Or you can grind manually in a mortar and pestle. That works better.

  5. Sometimes, when I'm using a food processor I give up and add the oil into the mix. Technically you are supposed to fry the paste in oil. But I find when you start cooking it off some of the oil comes out. And your goal is to get the oil into the paste anyway.

  6. Once you have pureed it pour the oil (if you haven't already added it to the paste) into a small frying pan and heat over medium low heat.

  7. When the oil starts to shimmer add the paste and fry, stirring regularly, for about 4-5 minutes. It will darken a bit and start to give off quite a rich aroma. When you get the aroma it's done. You will get it when you get there.

  8. Alternately, If you added the oil to get the paste to puree transfer it to a dry pan and cook over medium low heat as above.

  9. Nam prik pao stores well in a small jar for weeks in the fridge.

Recipe from Romain, Glebekitchen

Print Friendly and PDF

Comment

Grilled Cabbage Wedges

Comment

Grilled Cabbage Wedges

Cabbage may be the unsung hero of the vegetable universe. It is nutrient-dense, has a very long shelf life (just peel away the outer layers), can be eaten cooked or raw, and shows up in just about every culture’s cuisine around the world. It is the epitome of versatility and value. Here’s hands down my favorite way to cook it in the summer:

Photo: Mia Yakel |The Kitchn

Photo: Mia Yakel |The Kitchn

Ingredients

Serves 4-8

1 head of cabbage

1/3 cup of canola or vegetable oil

pinch of salt

dressing of your choice (recommended: peanut sauce)


  1. Turn on your grill! It should be smoking hot when you place your cabbage wedges, so give it time to warm up while you prep.

  2. Slice the cabbage in half, and then slice additional wedges from the core so that they remain intact. Makes about 6-8 wedges, depending on the cabbage size. Each wedge is 1-2” thick at the outside.

  3. Brush each wedge with oil, add a little salt and seasoning to taste.

  4. Grill temp should be very hot. Grill the wedges for 5-10 minutes per side in an enclosed grill so it will sear the outer layers and cook through the inner layers.

  5. While it’s grilling, I love to prepare a simple sauce or dressing, my favorite being peanut sauce.

  6. Once you take the cabbage off the grill, drizzle with your dressing, and serve as a warm, summer salad.

Recipe by Robin Chanin

Print Friendly and PDF

Comment

Spicy Beet Soup with Ginger and Coconut Milk

Comment

Spicy Beet Soup with Ginger and Coconut Milk

A hearty soup that will thoroughly warm you up, this soup balances ginger and bird's eye chilies with sweet, earthy beets and rich, creamy coconut milk. 


IMG_4725.JPG

Ingredients

Serves 6-8

  • 1 1/2 pounds beets

  • 1 tsp vegetable oil

  • 1 medium yellow onion, diced

  • 1 1/2 Tbsp ginger, peeled and minced

  • 2 bird's eye chilies

  • 1/2 tsp ground coriander

  • 1 13.5 oz can coconut milk

  • 1 cup water

  • 1 tsp fish sauce (leave this out if you want a vegan recipe)

  • 1/2 tsp kosher salt

  • 1 tsp freshly squeezed lime juice

  • for garnish: 1 green onion, some pickled radish, lime zest, lime juice


  1. Wash the beets, put them in a pot, cover them with water and bring to a boil. Cook 20-30 minutes until very soft. Remove from heat, drain, and allow to cool before rubbing off the skins. You might want to wear gloves if you don't want pink fingers. Depending on the size you may need to cut them up into smaller chunks so that they puree easily later on.

  2. While the beets are cooling cut the onion, ginger, and chilies. You might want to wear gloves when you handle the chilies, they are pretty hot. At the very least wash your hands right after so that you don't accidentally spread the hotness to more delicate places. Also, the best way to peel ginger is with the edge of a spoon, it's amazing.

  3. Heat the vegetable oil in the same pot (after you wash and dry it).

  4. Cook the onions until they are translucent, then add the ginger and chilies and continue to saute for 1-2 more minutes. Add the coriander and cook for 30 seconds more.

  5. Now you can add the rest of the ingredients: beets, coconut milk, water, fish sauce, lime juice, and salt. Cover and bring to a boil, reduce the heat to simmer for 10 minutes.

  6. Puree until very smooth. Taste and adjust with salt if needed.

  7. To make the garnish cut some pickled radishes, green onions, and a peel of lime zest into the thinnest strips you can manage. Toss together with a squeeze of lime juice and top each bowl with a small amount.

Enjoy
-Matt

IMG_4724.JPG
Print Friendly and PDF

Comment

Arugula Gremolata

Comment

Arugula Gremolata

Gremolata doubles as a condiment and garnish. It's easy to make, bright and flavorful, and can complement a range of dishes from smoked brisket to braised veal shank to roasted asparagus. Traditionally it's made with parsley but substituting arugula gives it a peppery kick.


Photo: Mathew Green

Photo: Mathew Green

Ingredients

serves 6-8

  • 1 cup loosely packed arugula leaves

  • 4 cloves garlic

  • all of the zest from one lemon

  • 1 tsp fish sauce

  • 1 tsp lemon juice


  1. Wash and dry the arugula.

  2. Peel the garlic.

  3. Wash the lemon. Use a vegetable peeler to peel off strips of skin from the lemon. Don't go so deep as to cut off the white pith, you don't want that.

  4. Chop everything separately, then combine it and chop some more. You may be tempted to just throw it all in a food processor but I urge you not to. It's not going to save you time because you'll have to clean it and that's a pain. And the texture of the finished product won't be the same. Take a minute to do it by hand.

  5. Toss with the fish sauce and lemon juice and serve as soon as possible.

  6. I put it on some smoked brisket because I happened to have some smoked brisket, but you can really use this on just about anything. Grilled steak, pork chops, roast chicken, steamed fish, grilled or roasted vegetables, and so on.

Recipe by Chef Mathew Green

Print Friendly and PDF

Comment

Roasted Baby Carrots and Hakurei Turnips with Green Garlic Aioli

Comment

Roasted Baby Carrots and Hakurei Turnips with Green Garlic Aioli

Ingredients

  • 1 egg yolk

  • 2 TB chopped green garlic

  • 1 TB rice wine vinegar

  • 1/4 tsp kosher salt

  • 1/2 cup sunflower oil (or other vegetable oil)

  • A bunch of small carrots and some Hakurei turnips

1. Put a cast iron frying pan into a cold oven and heat it up to 400F.

2. Make the aioli while the oven gets hot: Separate the egg and save the white for breakfast. Whisk together the egg yolk, green garlic, vinegar, and salt in a small bowl. Set the bowl on a damp towel so it doesn't slide around while you are whisking. Very slowly drizzle the oil in to the egg yolk until it's all combined.

3. Remove the greens from carrots and turnips and reserve for other uses (the carrot greens can be used like parsley and are great in salads, the turnip greens can be cooked along with kale, chard, spinach or other greens). Scrub them and peel the carrots if you want to. Cut the turnips into quarters and toss with a drizzle of oil and a sprinkle of salt. Put the carrots and turnips in the hot pan and return to the oven. Roast for about 8-10 minutes until cooked through and started to darken. Check on them occasionally and stir them around with a wooden spoon. Serve with the aioli as a dipping sauce.

Print Friendly and PDF

Comment